|
| 300915 and below 011015 |
 |
| stairwells just to be weathered. Basic shape of removable Armoury roof |
Building this project has taken quite a lot of time. One of the advantages of such a protracted construction has been the frequent ideas which have come to me as the whole thing took shape. Experiments and triumphs have begat ideas. Leaving things not quite complete has allowed me to revisit and extend or expand.
 |
| the basic construction of the main stair wall |
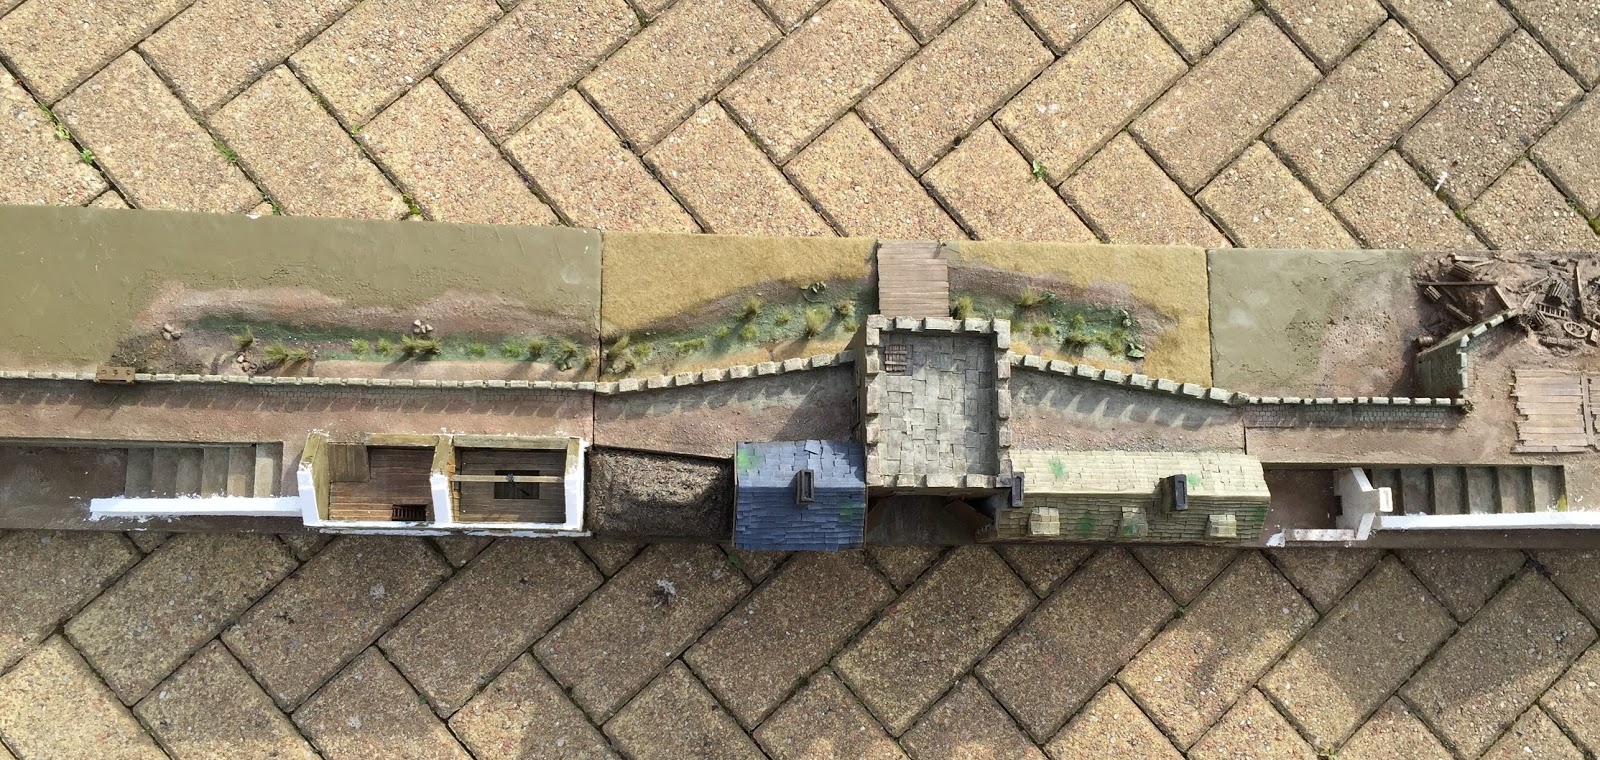
One such example was the two large stairways. I knew they seemed out of proportion when built but this was for a very pragmatic reason - I wanted them to be wide and deep enough to take at least two individually based models without overlap or instability. These were some of the first features to be built and painted but I had thoughts that I would go back to them at some point... for what, I wasn't sure.
 |
| A blog member requested this scaling shot |
I envisioned some kind of safety wall or balustrade and in the end opted for a simple but sturdy design in keeping with the functional and plain nature of Derry's fortifications. The construction of both a single and double wall section can be seen in the accompanying photos. The wall adjoining the Armoury creates a particularly striking effect with which I was very pleased.
 |
| This wall added a huge amount to the model |
The Armoury was an afterthought but has proved to be the most complex construction in the project so far. I wanted a plain building which looked strong, with few windows but a main door and two sets of loading doors - one set on the front wall and the other opening onto the battlements.
 |
| under construction the Armoury roof nightmare |
The idea of having openings to the lower floors came after the initial construction of the gable ends and during a trip away from home. The cross beam with lifting chains was a post script to the afterthought!
 |
| Why didn't I listen to Clarence on the shingle roof strategy?? |
The time was taken creating the upper floors and a lift off roof the tiling of which was tedious because of the smaller size of card tile I chose to use. There were of course other and quicker ways to create the tile roof but I like the look of individual placed and misplace tiles.
 |
| This was a real pain in the ***e |
This is indeed a fiddly job and I can attest that the creation of the tiles and subsequent tiling of this one roof took over 6 hours to do. As I used relatively thin card for the roof surface I experimented with various forms of reinforcement as I anticipated the number of times it would be lifted off and replaced. Only time will tell if I judged the reinforcement correctly.
 |
| learn how I came a cropper on this design in the next instalment! |
Having spent so long gazing and cogitating over this project I almost feel I have walked every model inch of it and that in itself sparks ideas for small additions and modifications. On the eve of starting the final edifice which I have sketched numerous time now without deciding on a final design, I can feel the photo shoots (which were in fact the sole purpose of its construction in the first place) beckoning.