Quite a few people have been asking for a how to guide for painting, rigging and basing the 1/2400 scale Dutch Wars ships. So, here we are..
I have chosen a 4th rate model which costs £2.40.
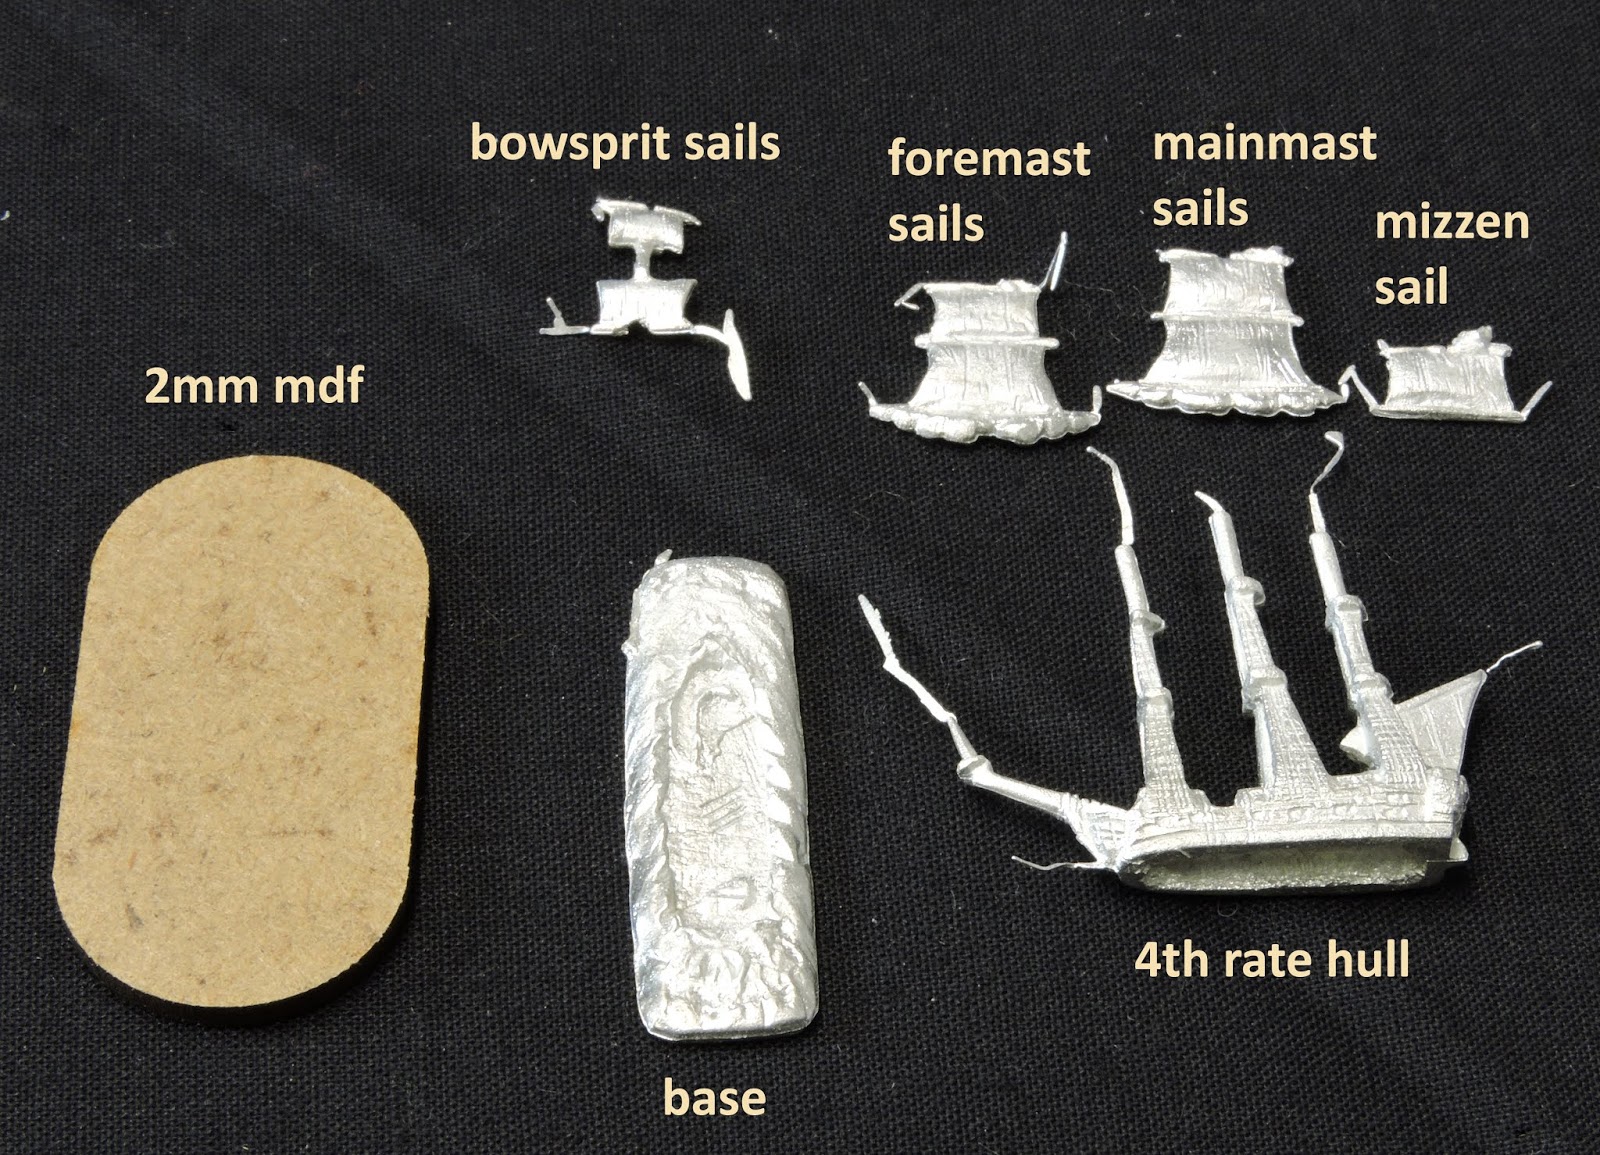
The contents of a pack are laid out above. The 2mm thick, 20 x 40mm pill base does not come with the model I buy these from Warbases in packs of 20. The price I don't recall but, it is less than £2 for that number. I think these ships are cast in pewter to get the level of detail. There is some flash and a bit of mould line cleaning required. Use a scalpel. Run the scalpel up and down the masts and be mindful of scraping off some of the small claggy lumps which occasionally appear at the masthead.
Run the scalpel vertically down the stern as mould flash occasionally forms a line from the base of the lateen sail to the rudder. Run the flat hull bottom across a broad rasp file one or twice to ensure it sits flat.
Undercoat in an off white - always better than brilliant white. All my paints are acrylic. Don't glue any of the sails on except the small ones on the bowsprit. These don't get in the way of other jobs and it will avoid some tricky and potentially messy reworking later.
Paint the masts first - sloppy is ok, you'll be tidy up later. After the masts do the ratlines - scramble netting on each side. Paint the insides as well as the outsides. Leave no undercoat showing anywhere. When you finish that, do the fighting tops and then the deck. I have shown indicative colours but use anything that suits. Hulls were often painted in bright colours as well as natural wood finish. Wet wood can vary in colour from honey to black.

Having painted from the inside out, now paint a thin coat of your chosen colour on the hull. This can be used on the decorative bow and stern too at this stage as you'll do the detail after the shading wash step. You may want the upper hull structure in a different and brighter colour. Do that now and also paint this colour to the edge of the deck. I use this colour on all the vertical faces inside the deck area too. You may also paint the waterline areas in a contrasting colour but this is not necessary if you don't feel like it.

Now, use a water based wash. I have experimented with Mid brown, dark tone, strong tone. soft tone, light tone but I find Soft Tone gives the result I am looking for. Wash down the whole ship in this but not the sails you have left unattached. Let it dry. I use an oil heater with a hot plate on top and it's done in about ten minutes.
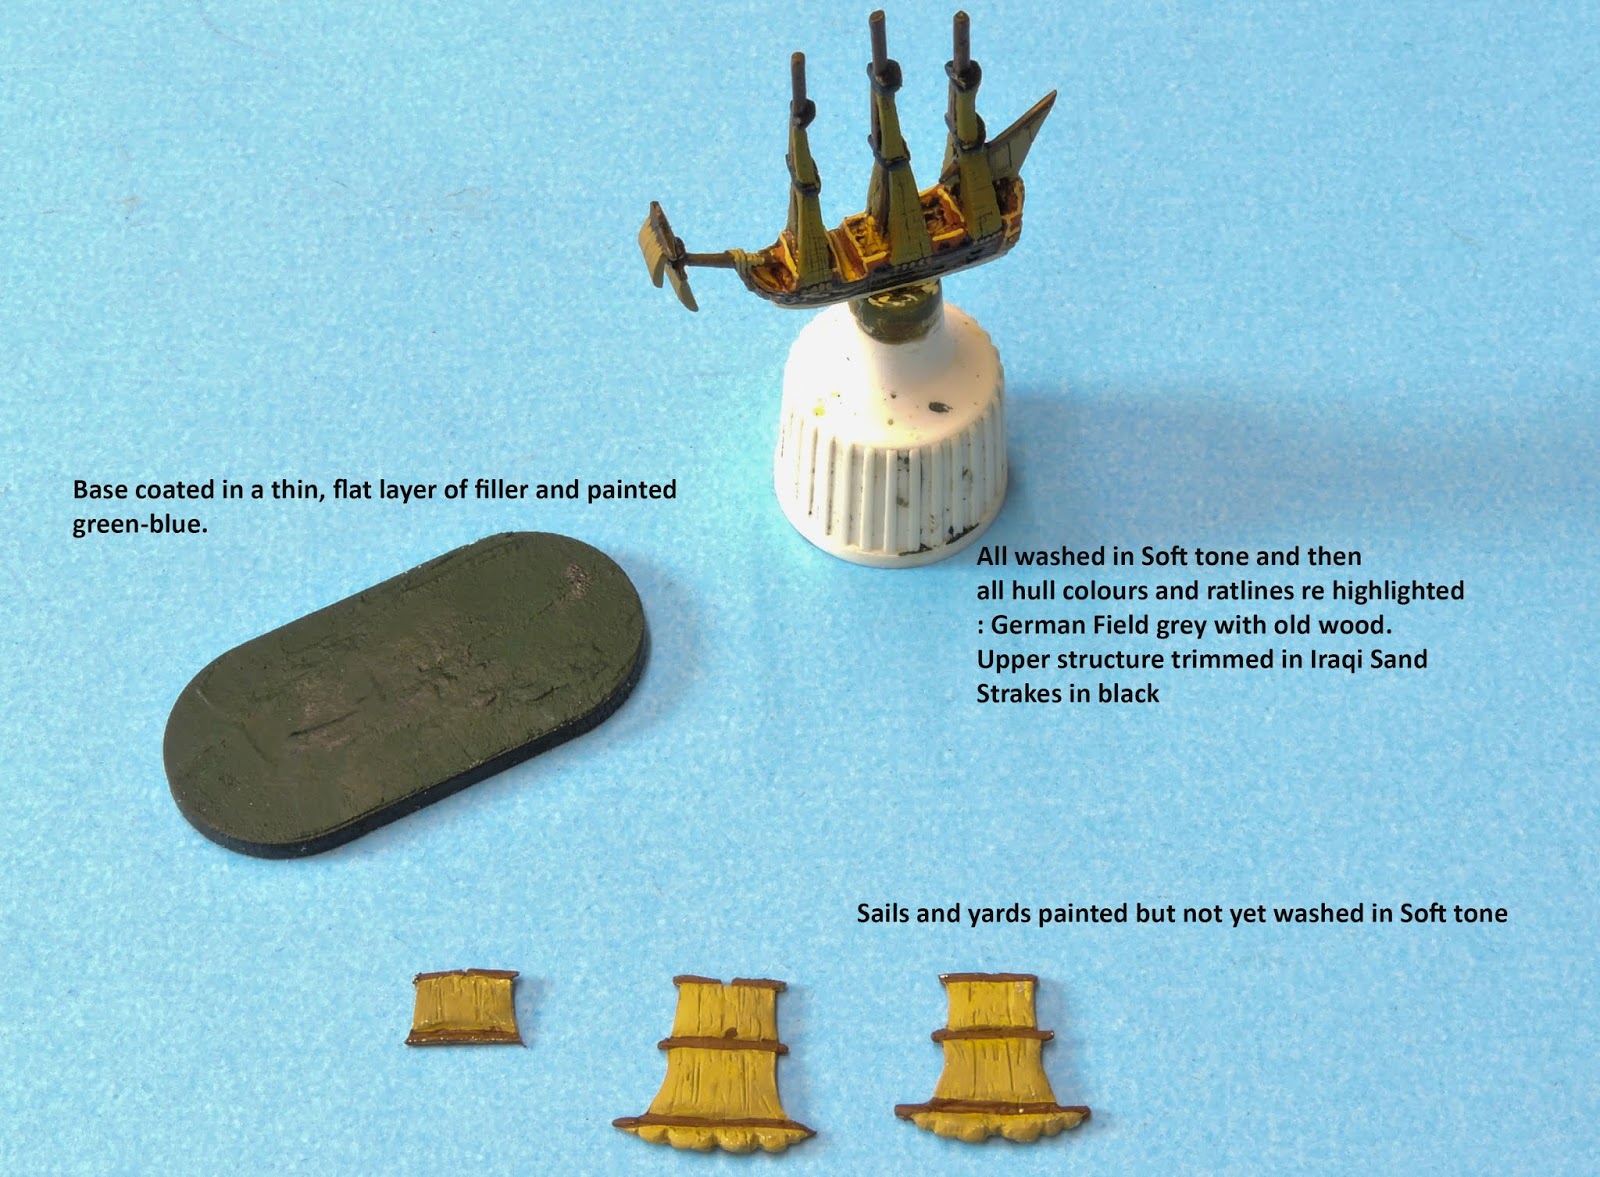
Paint the sails one or two tones up from your base coat colour. A good combination is:
Undercoat, Tan Yellow, highlight in Iraqi Sand, highlight in Pale Sand. Block in the spars - Flat Brown or similar.

Paint in as much detail as you want. I go quite heavy. Even at 1/2400 scale these models can take it. Use a fine brush to highlight the hull in a lighter tone from your chosen base colour. I paint the strakes (horizontal lines on the hull) black or chocolate brown. I also use a tiny brush to drip Military Shader wash into the gun ports to make the shadows stand out.
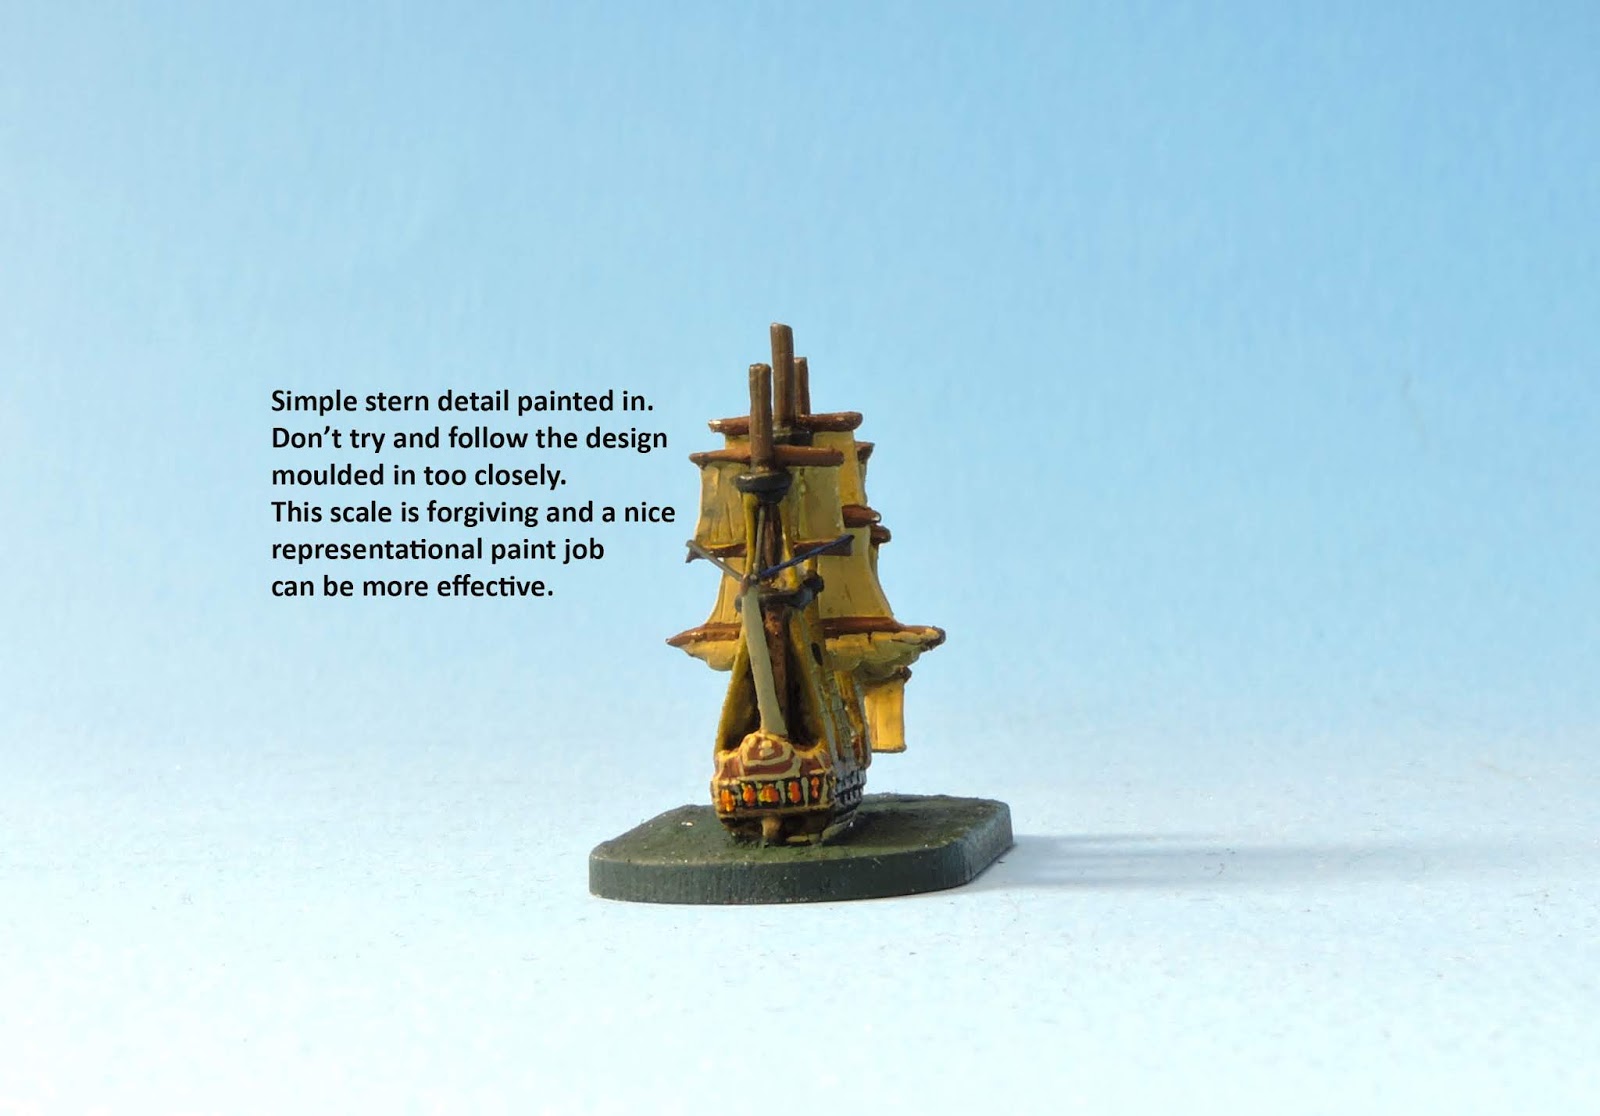
I usually do the stern detail at this point and run a high contrast colour over the edging of the top of hull colour. This really brings out the shape of the hull and features. Never use pure white if you can help it it looks too artificial.
 |
| Extra work on the base. |
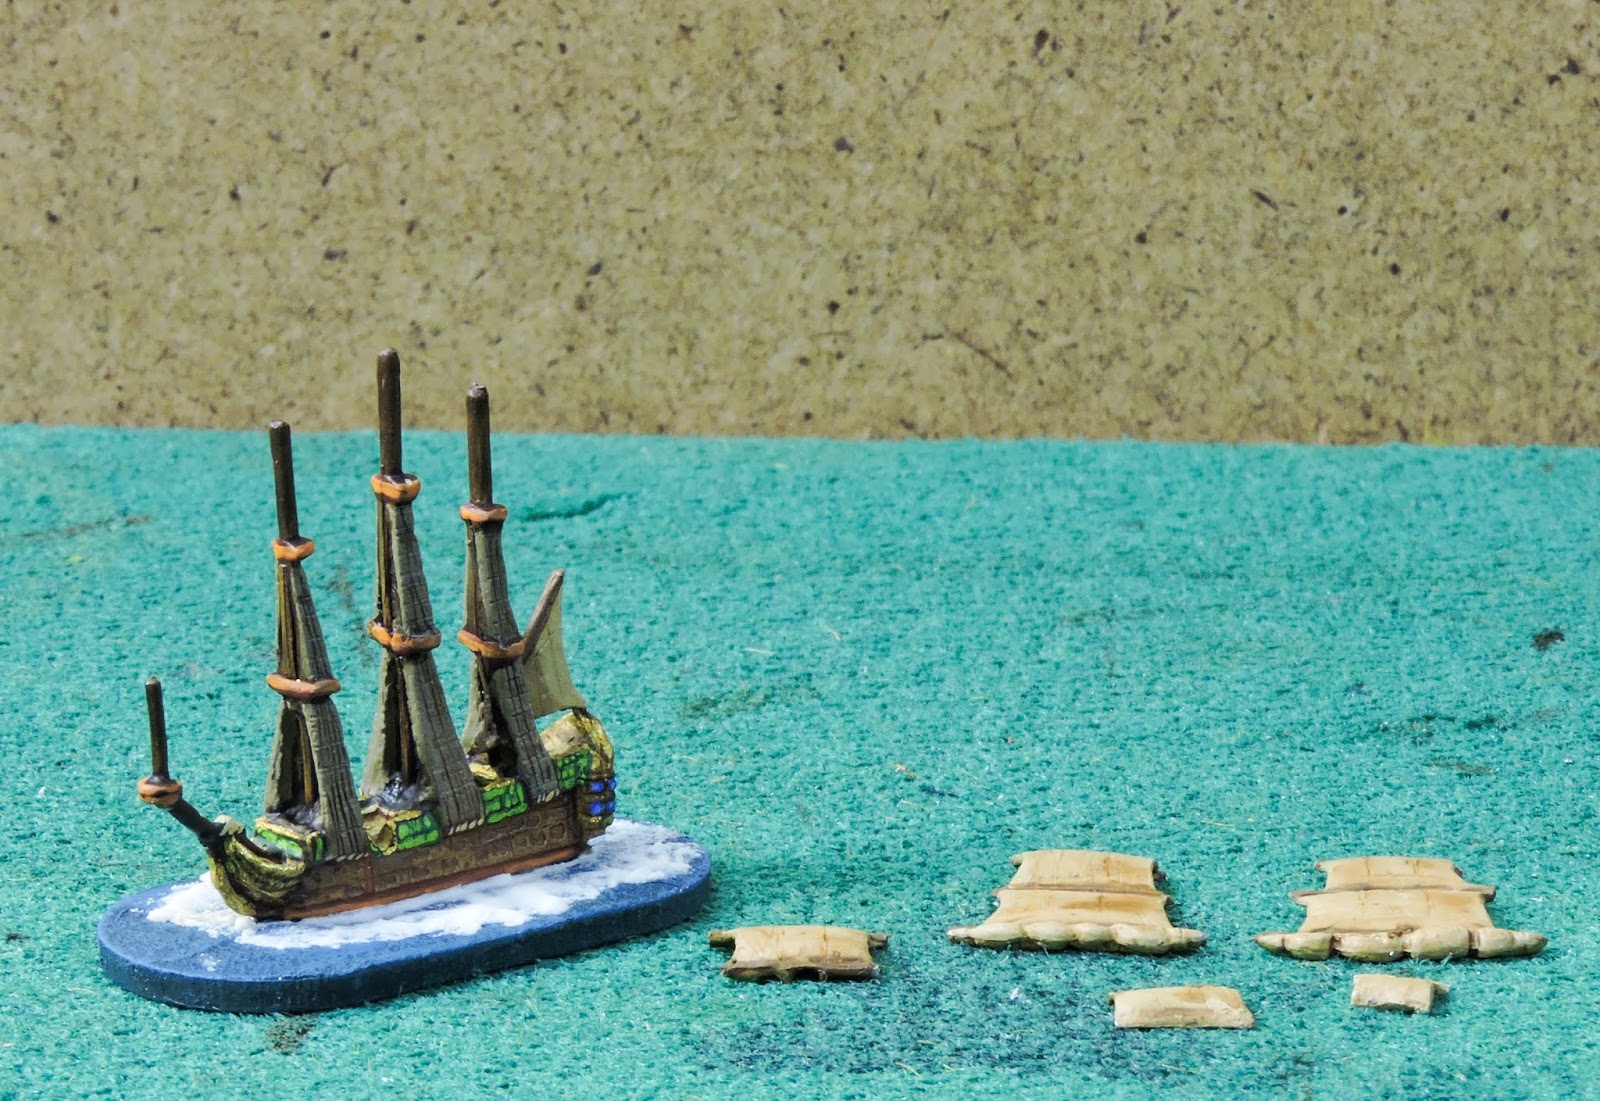
I varnish the hull in solvent based matt varnish at this stage and when dry, fix the hull onto the base. I often add extra watered down plaster on top of the already prepared base plaster to hide gaps between ship and base and create wake, bow wave etc. See above picture. Work it in with an old damp paintbrush. This all has to be painted over in your chosen sea colour. I like Prussian Blue with a little dark green and then highlighted in a lighter mix using flat green.
 |
| Some prepared flags. Poles are cut to size once painted. Secure to mast head with a light dab of superglue and paint over the glue. |
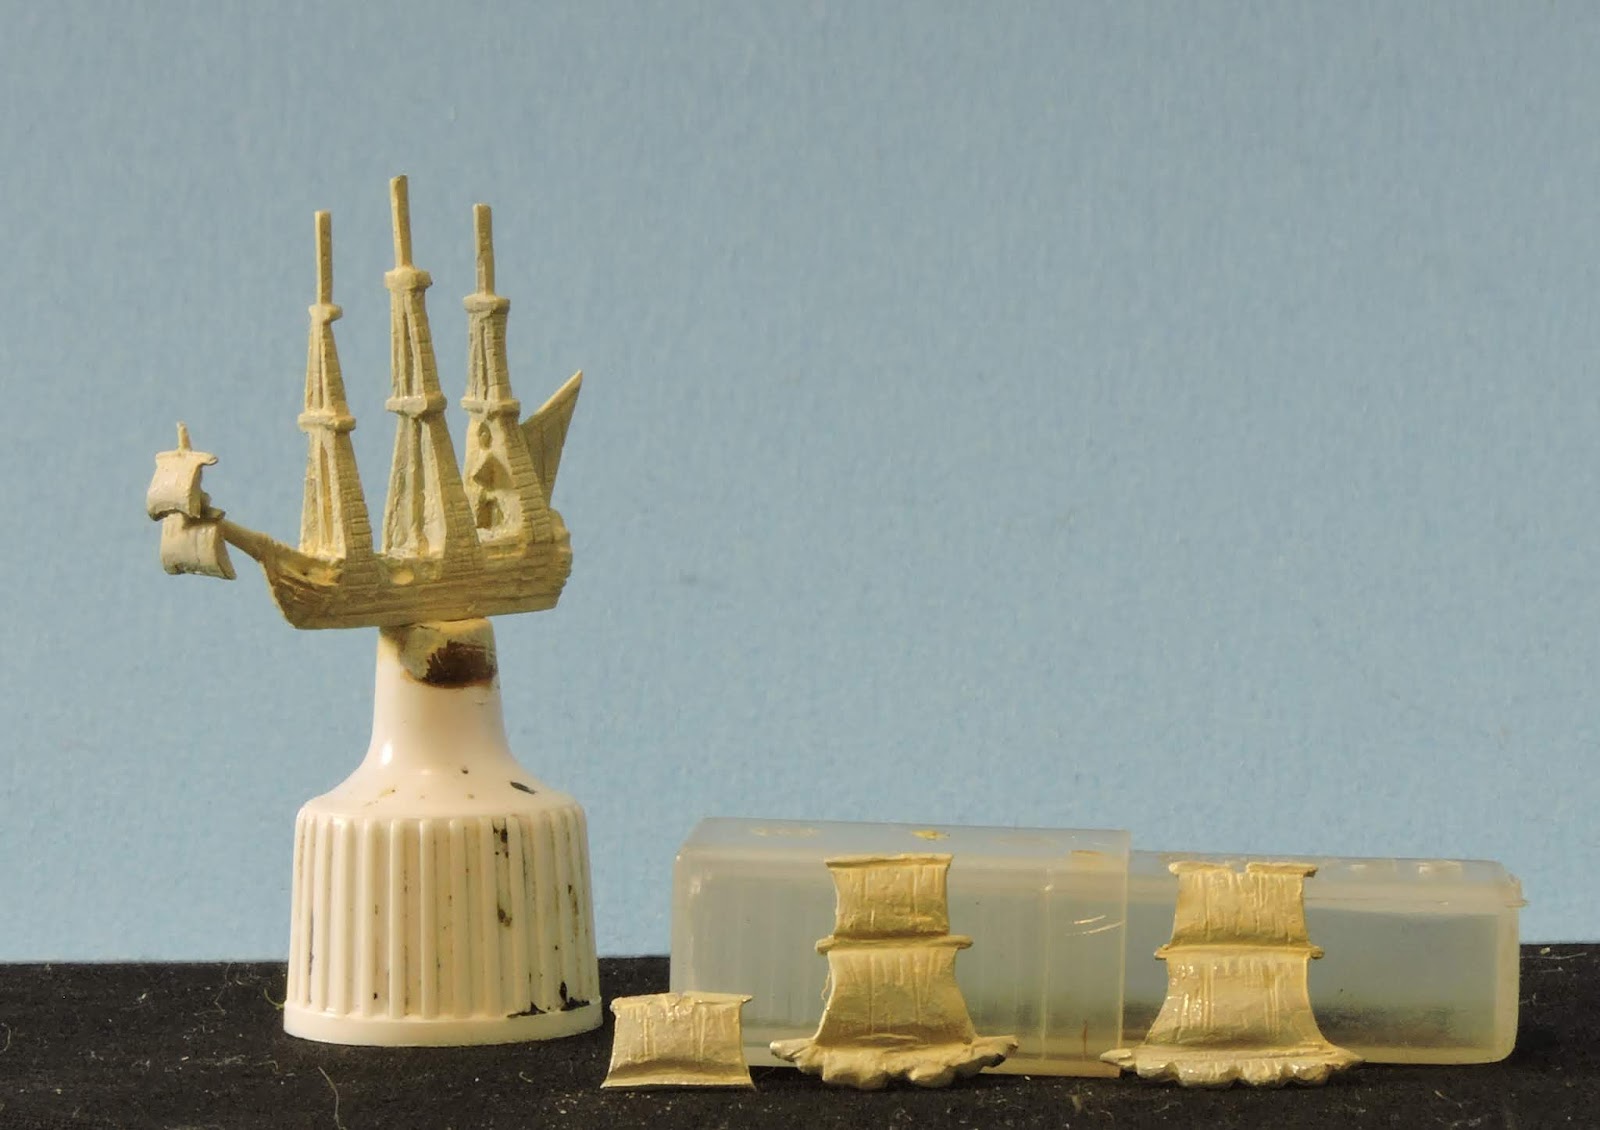
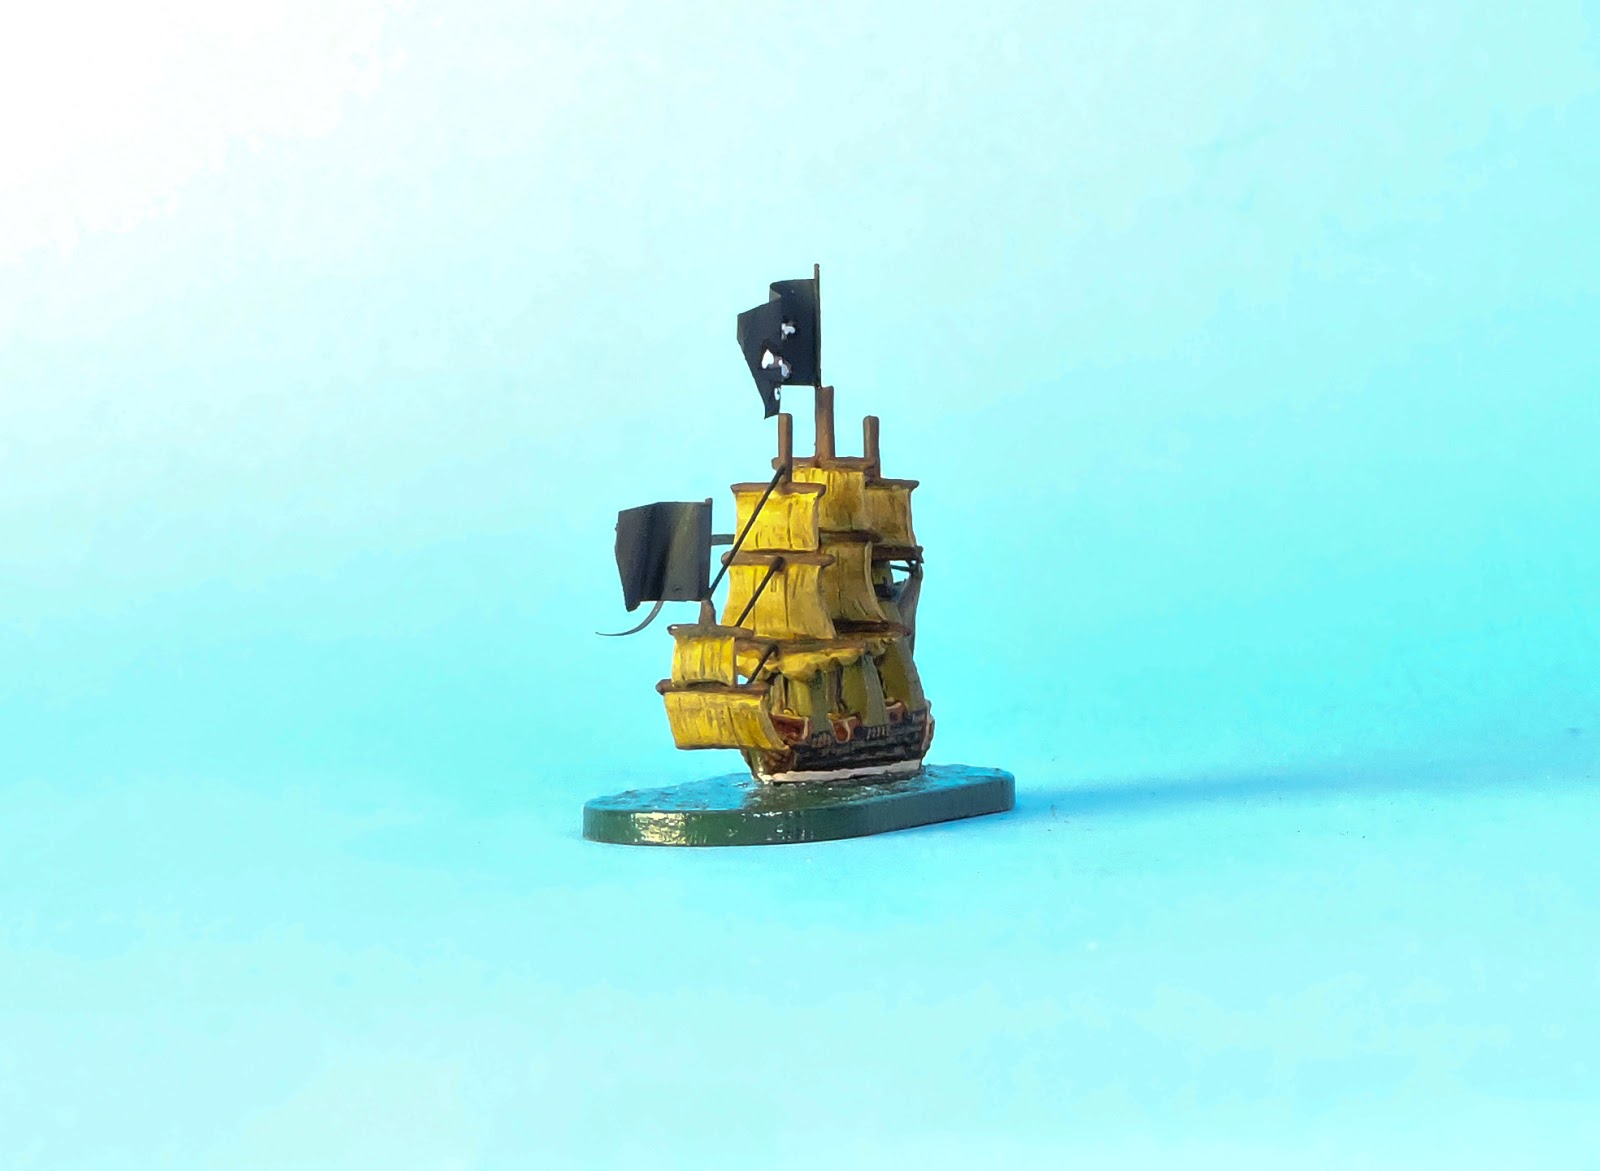
You may have decided on how many flags you want and what size. I hand make mine but if you can't be bothered with this fiddle then buy some! Be careful because double folded paper flags always look too thick and wrapping them round the top of the masts does I think, detract from the proportions of the finished model. I glue the foil to nylon fibres which take superglue very well. Press the cut-out section of fibre onto the foil with the blunt edge of your scapel. It will dry in a minute or so on a heater. Undercoat and paint on your design with the foil flat and then tease into the contours you want and highlight to taste. I always do two highlights above the base colour.
When you come to do the rigging fix the mizzen sail then add the rigging lines from that mast facing to the back of the mainmast. Then do the same for the mainmast and work you way forward. I paint the rigging black as I go. By not fixing all of the sails it is easier to get in and paint the rigging without making a mess.
Fix the sails by gluing the sail sprue for each mast just above the highest fighting top. Then when all sail are fixed, rigging in place and painted, run the soft tone over the entire sail yardage and this will tone everything in. Gently matt varnish the sail assembly when dry and be careful not to be too rough and dislodge your glued rigging! I have learned the hard way.

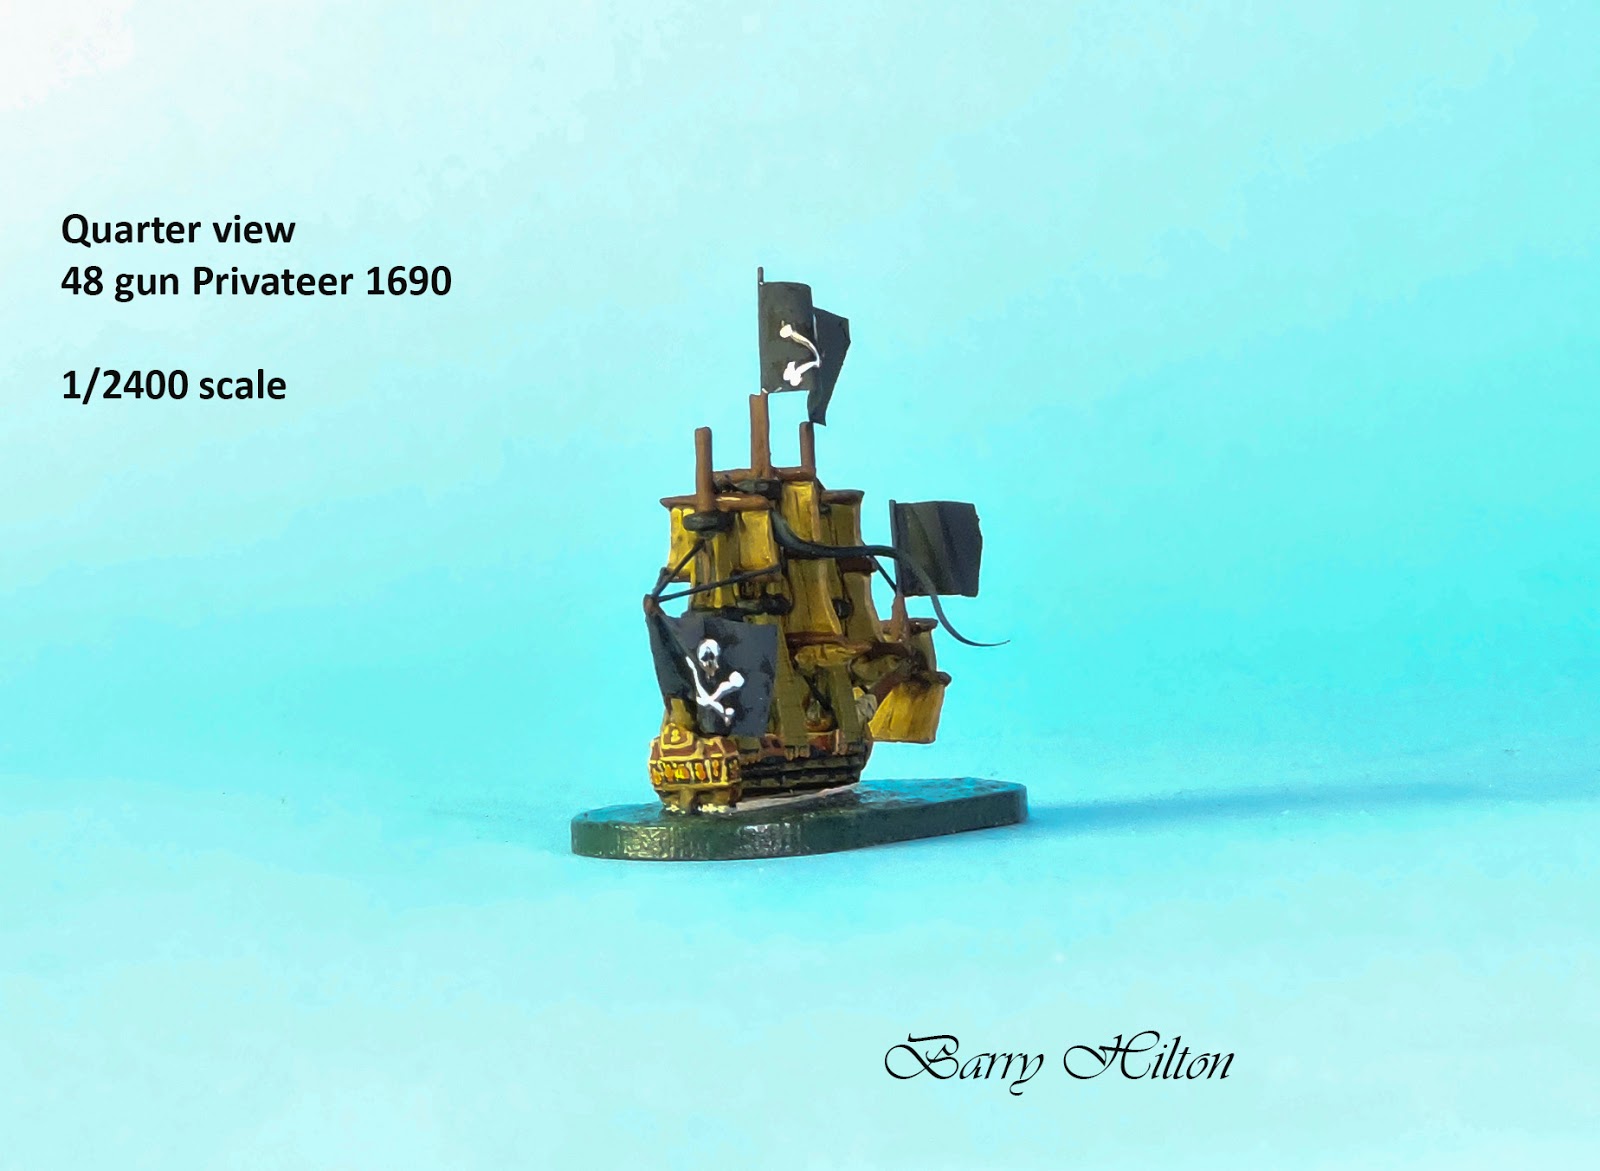
Remember to avoid a 101 mistake when fixing flags. If the ship is sailing with the wind ie: Running, broad reaching or even close hauling or tacking, the flags will face in the direction from which the wind blows. They will not point backward because if that was the case the ship would be sailing directly into the wind and not moving! The sails would also be concave ie inverted. This can ruin a nice paint job because it simply looks odd.
Rigging is of course representational in this scale but adding it is well worth the effort.

I prefer to finish my bases using high gloss yacht varnish. Remember and do the edges too!
 |
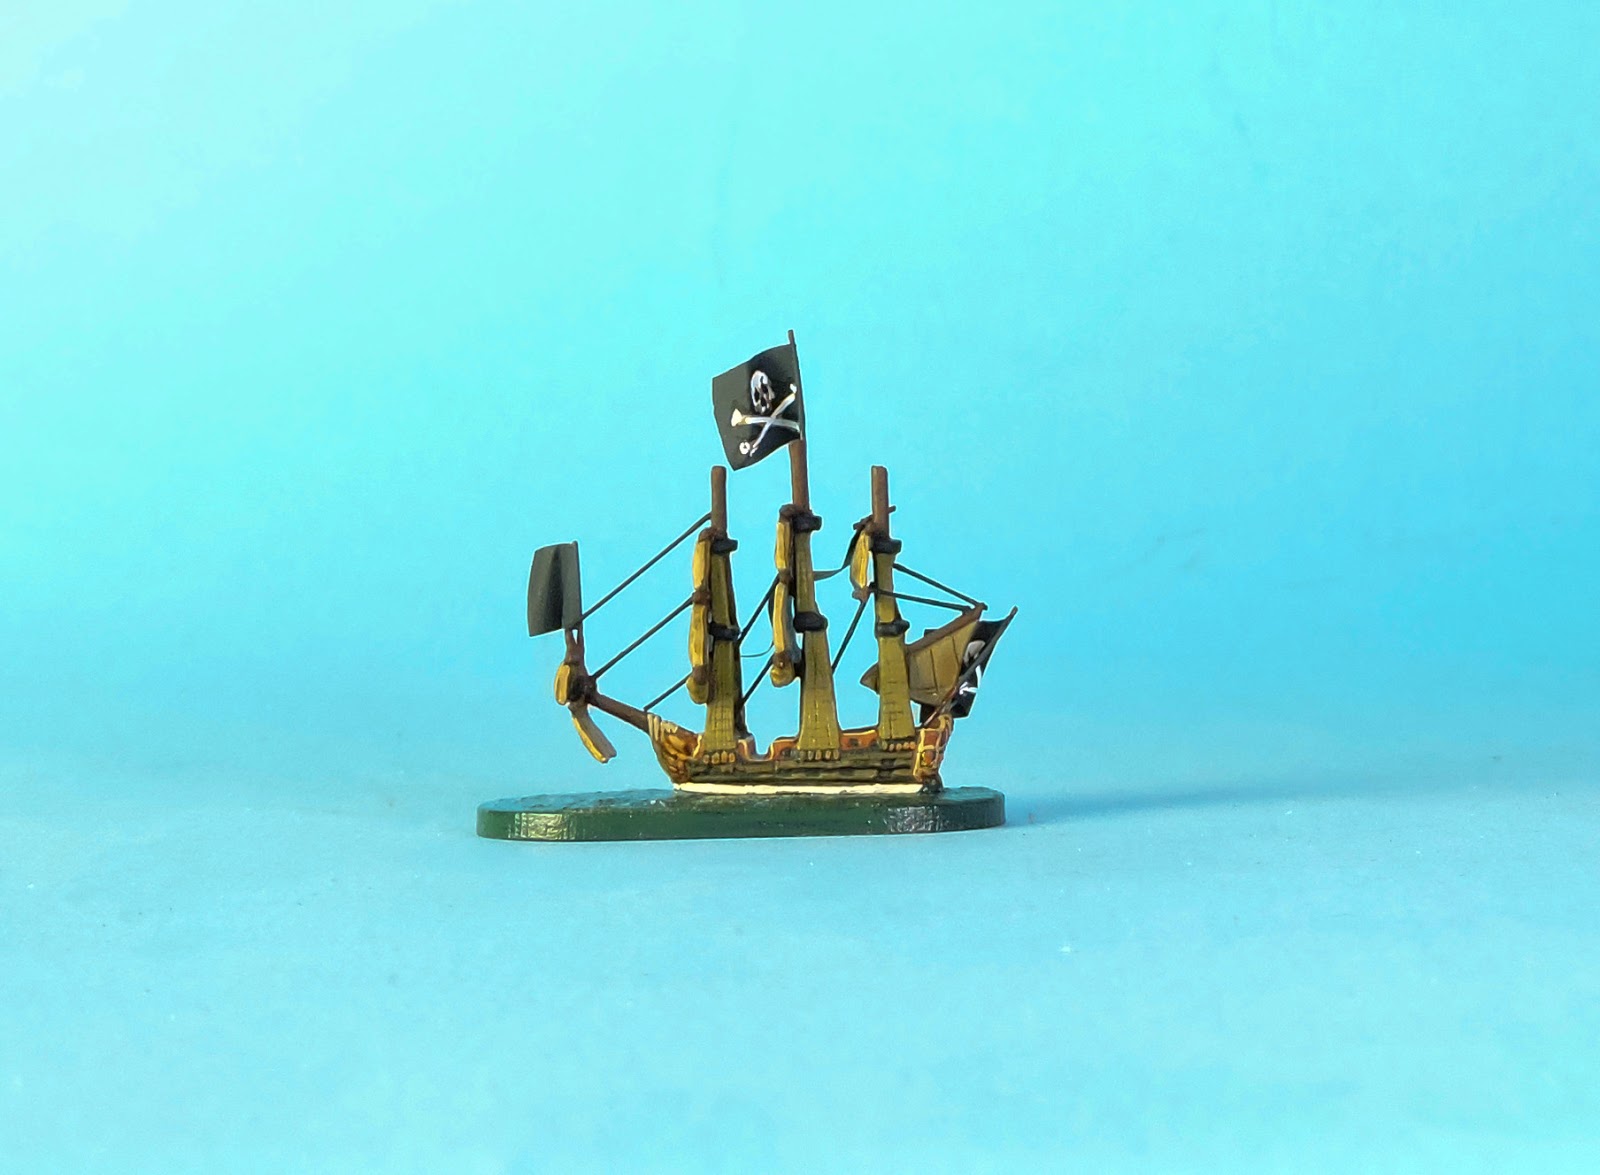
| Privateer - 48 guns and a match for the average State vessel designated to catch her! |
 |
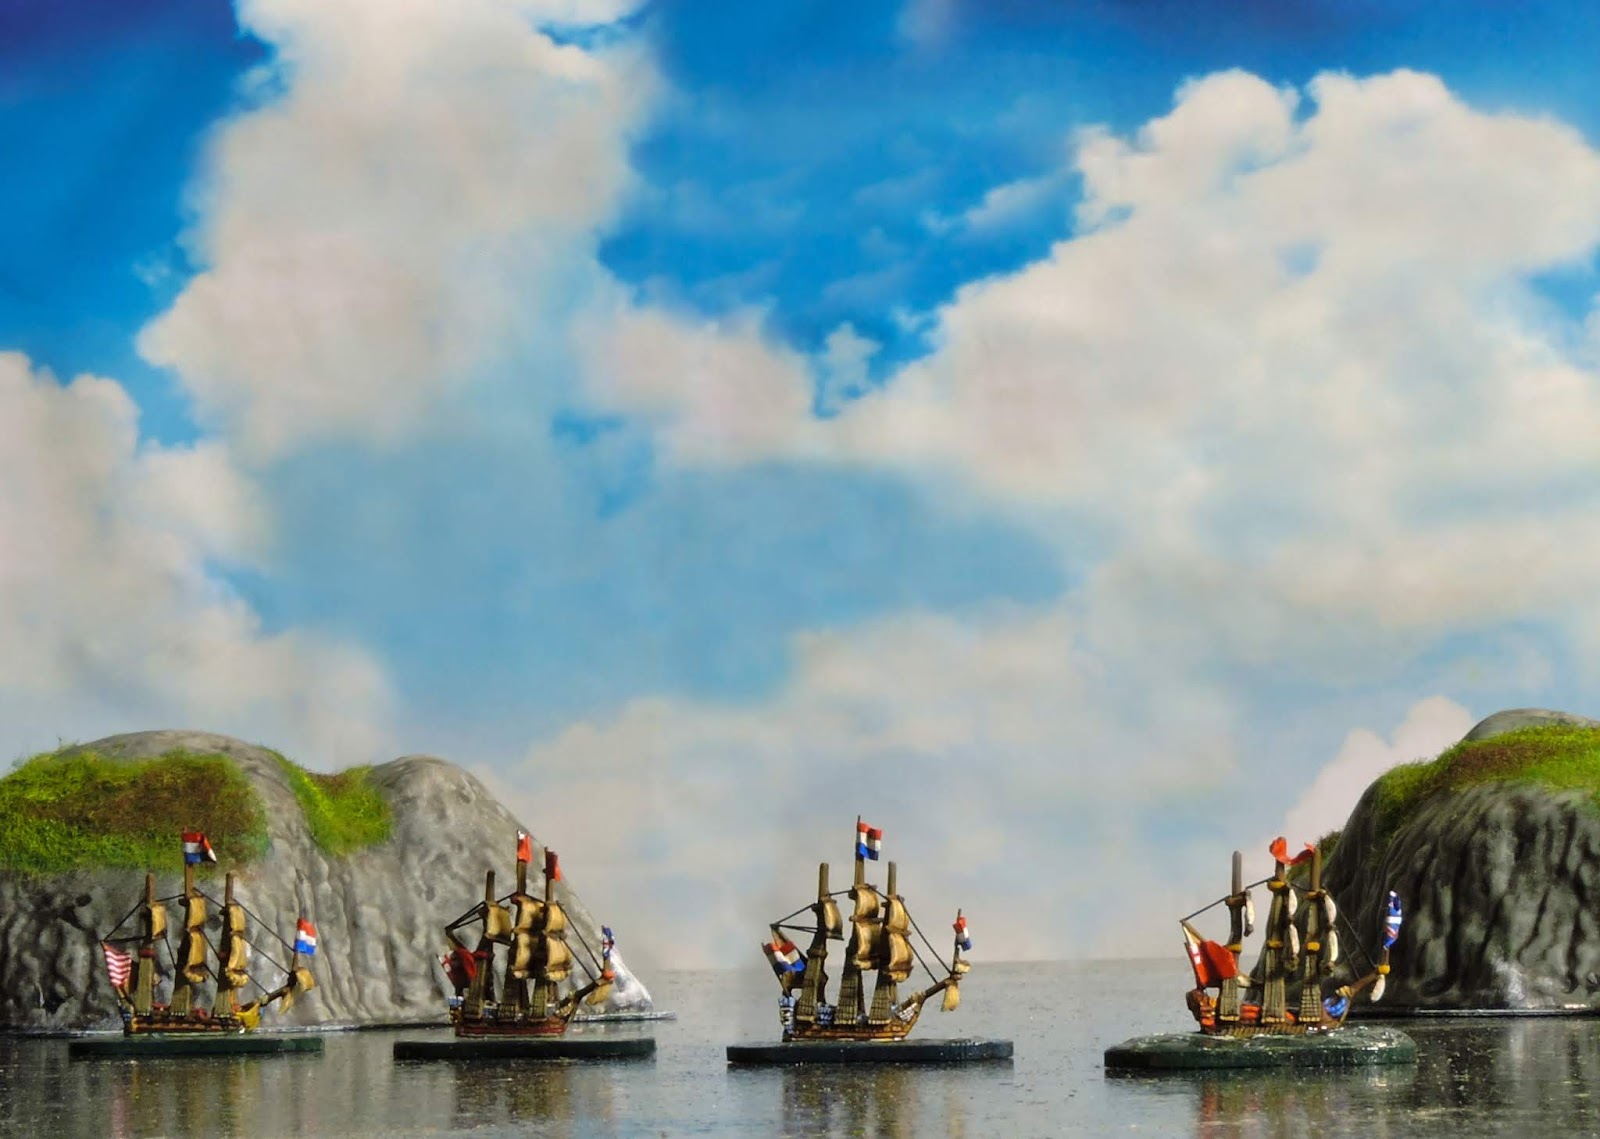
| Note the flags all going in the same direction and with the wind. |
The illustrated ship including all prep, flags etc took about three hours. Well worth it and if you put a squadron together say, five to six ships you'll have a gaming force for literally hundreds of hours of pleasure. Difficult to achieve with miniature armies unless you are working in 2mm!
 |
| The Forces of Justice? Don't make me laugh! |
This model is from Tumbling Dice Miniatures.