 |
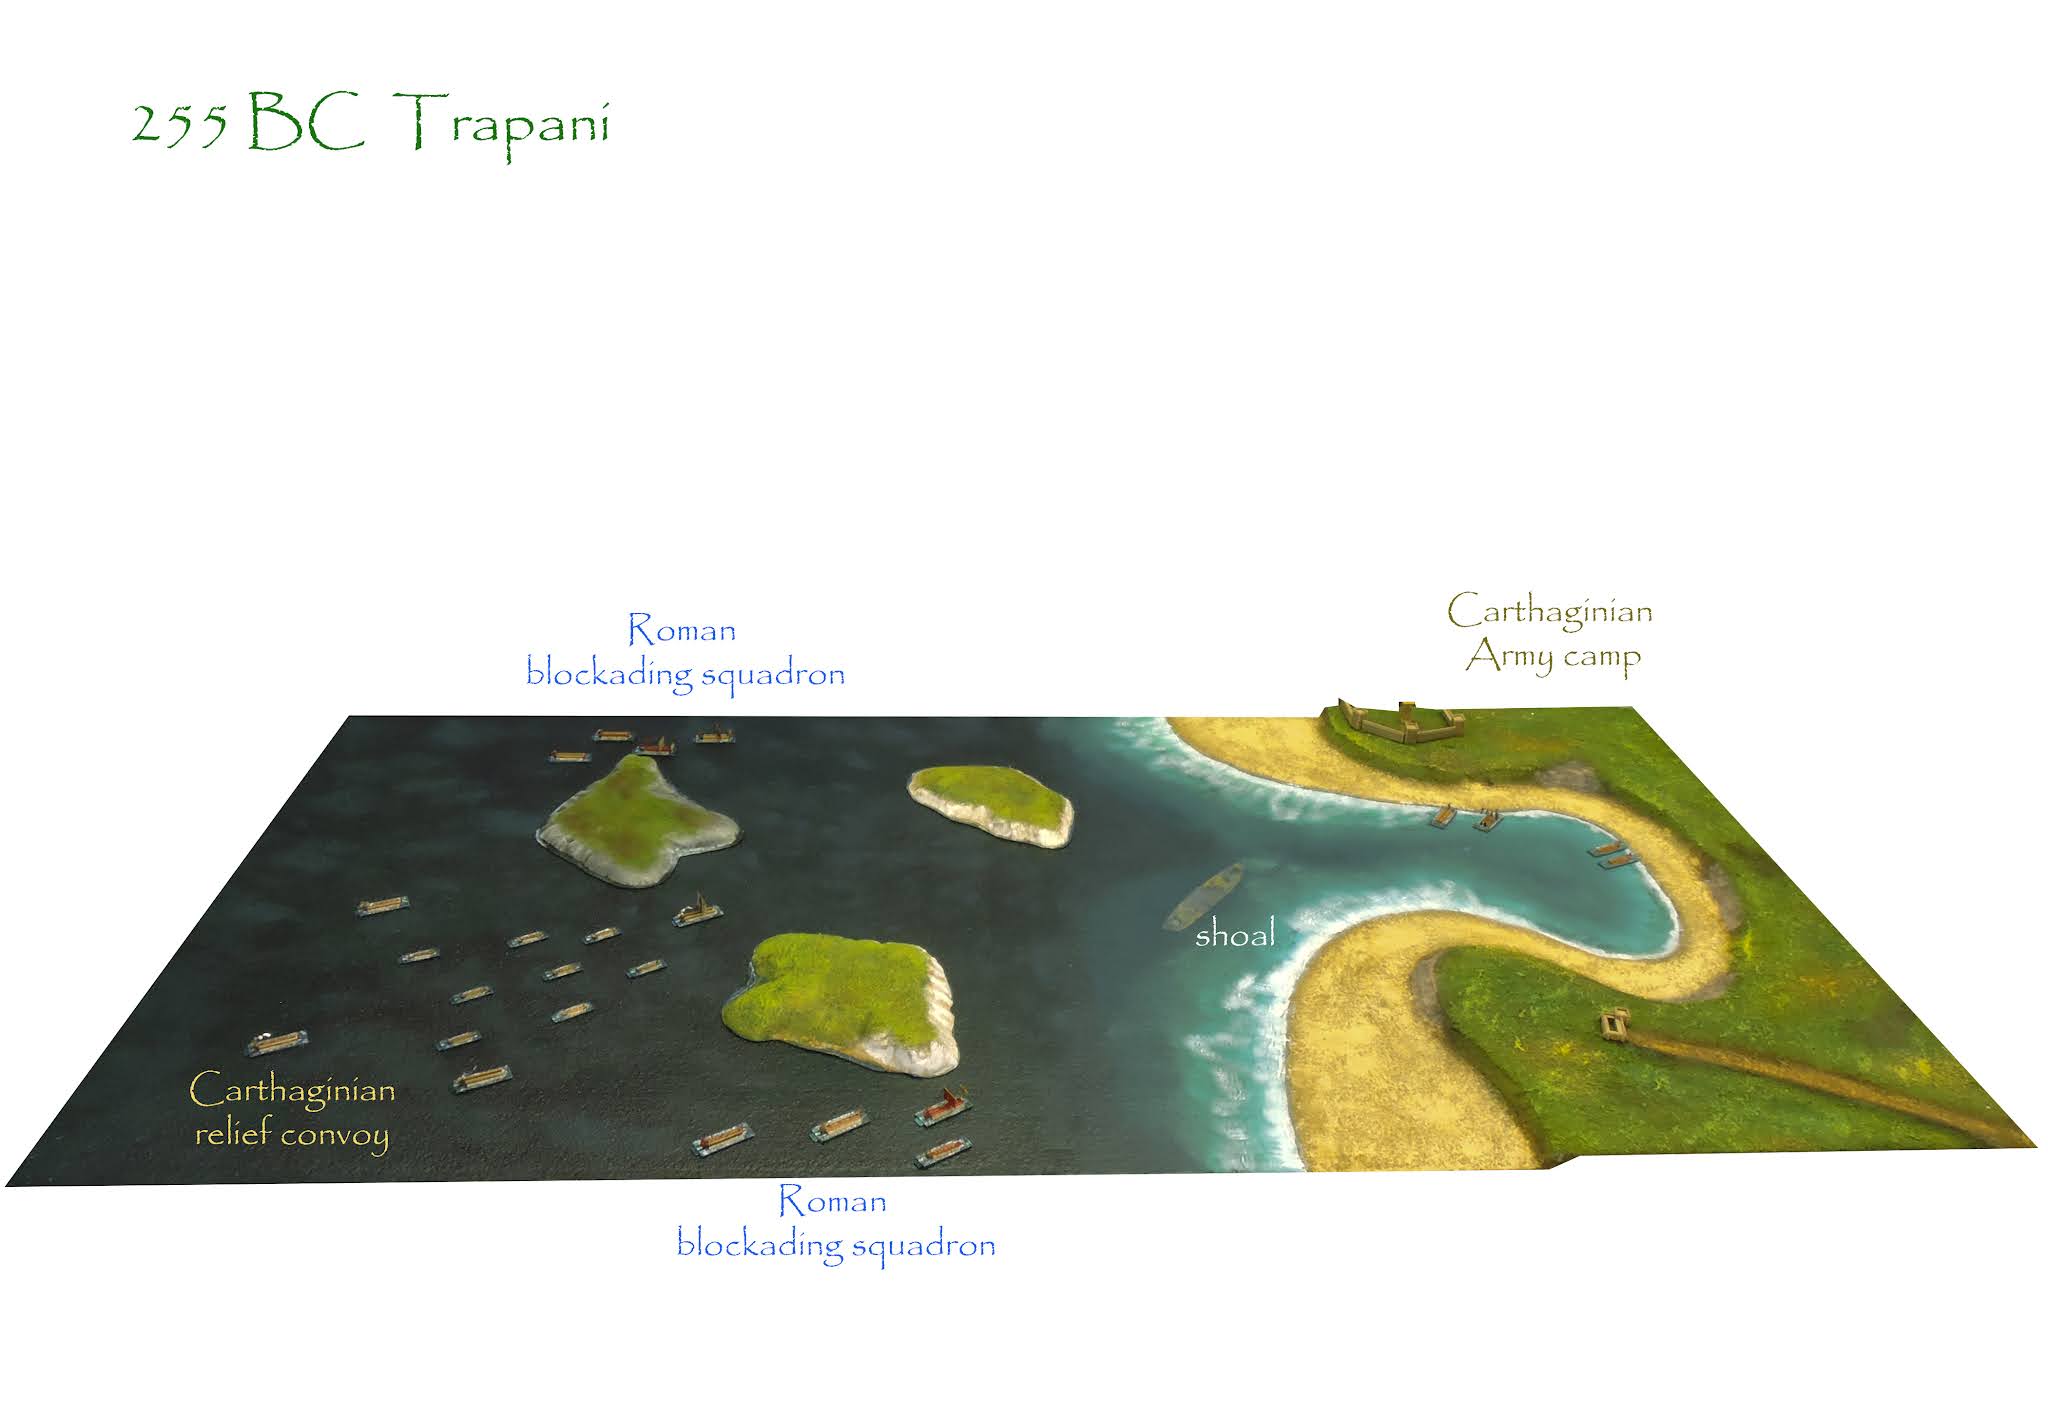
| The game set up - 1/1200 scale, 2 x 4 table Mad for War rules |
This encounter, set around 255 BC sees a Carthaginian relief fleet attempting to land supplies to support a hard-pressed army on the western tip of Sicily near Trapani. The Romans are blockading the island and the escort must penetrate the screen of Roman ships and navigate through narrow island channels to reach a bay in which other Carthaginian ships are anchored in the shadow of a fortified settlement.
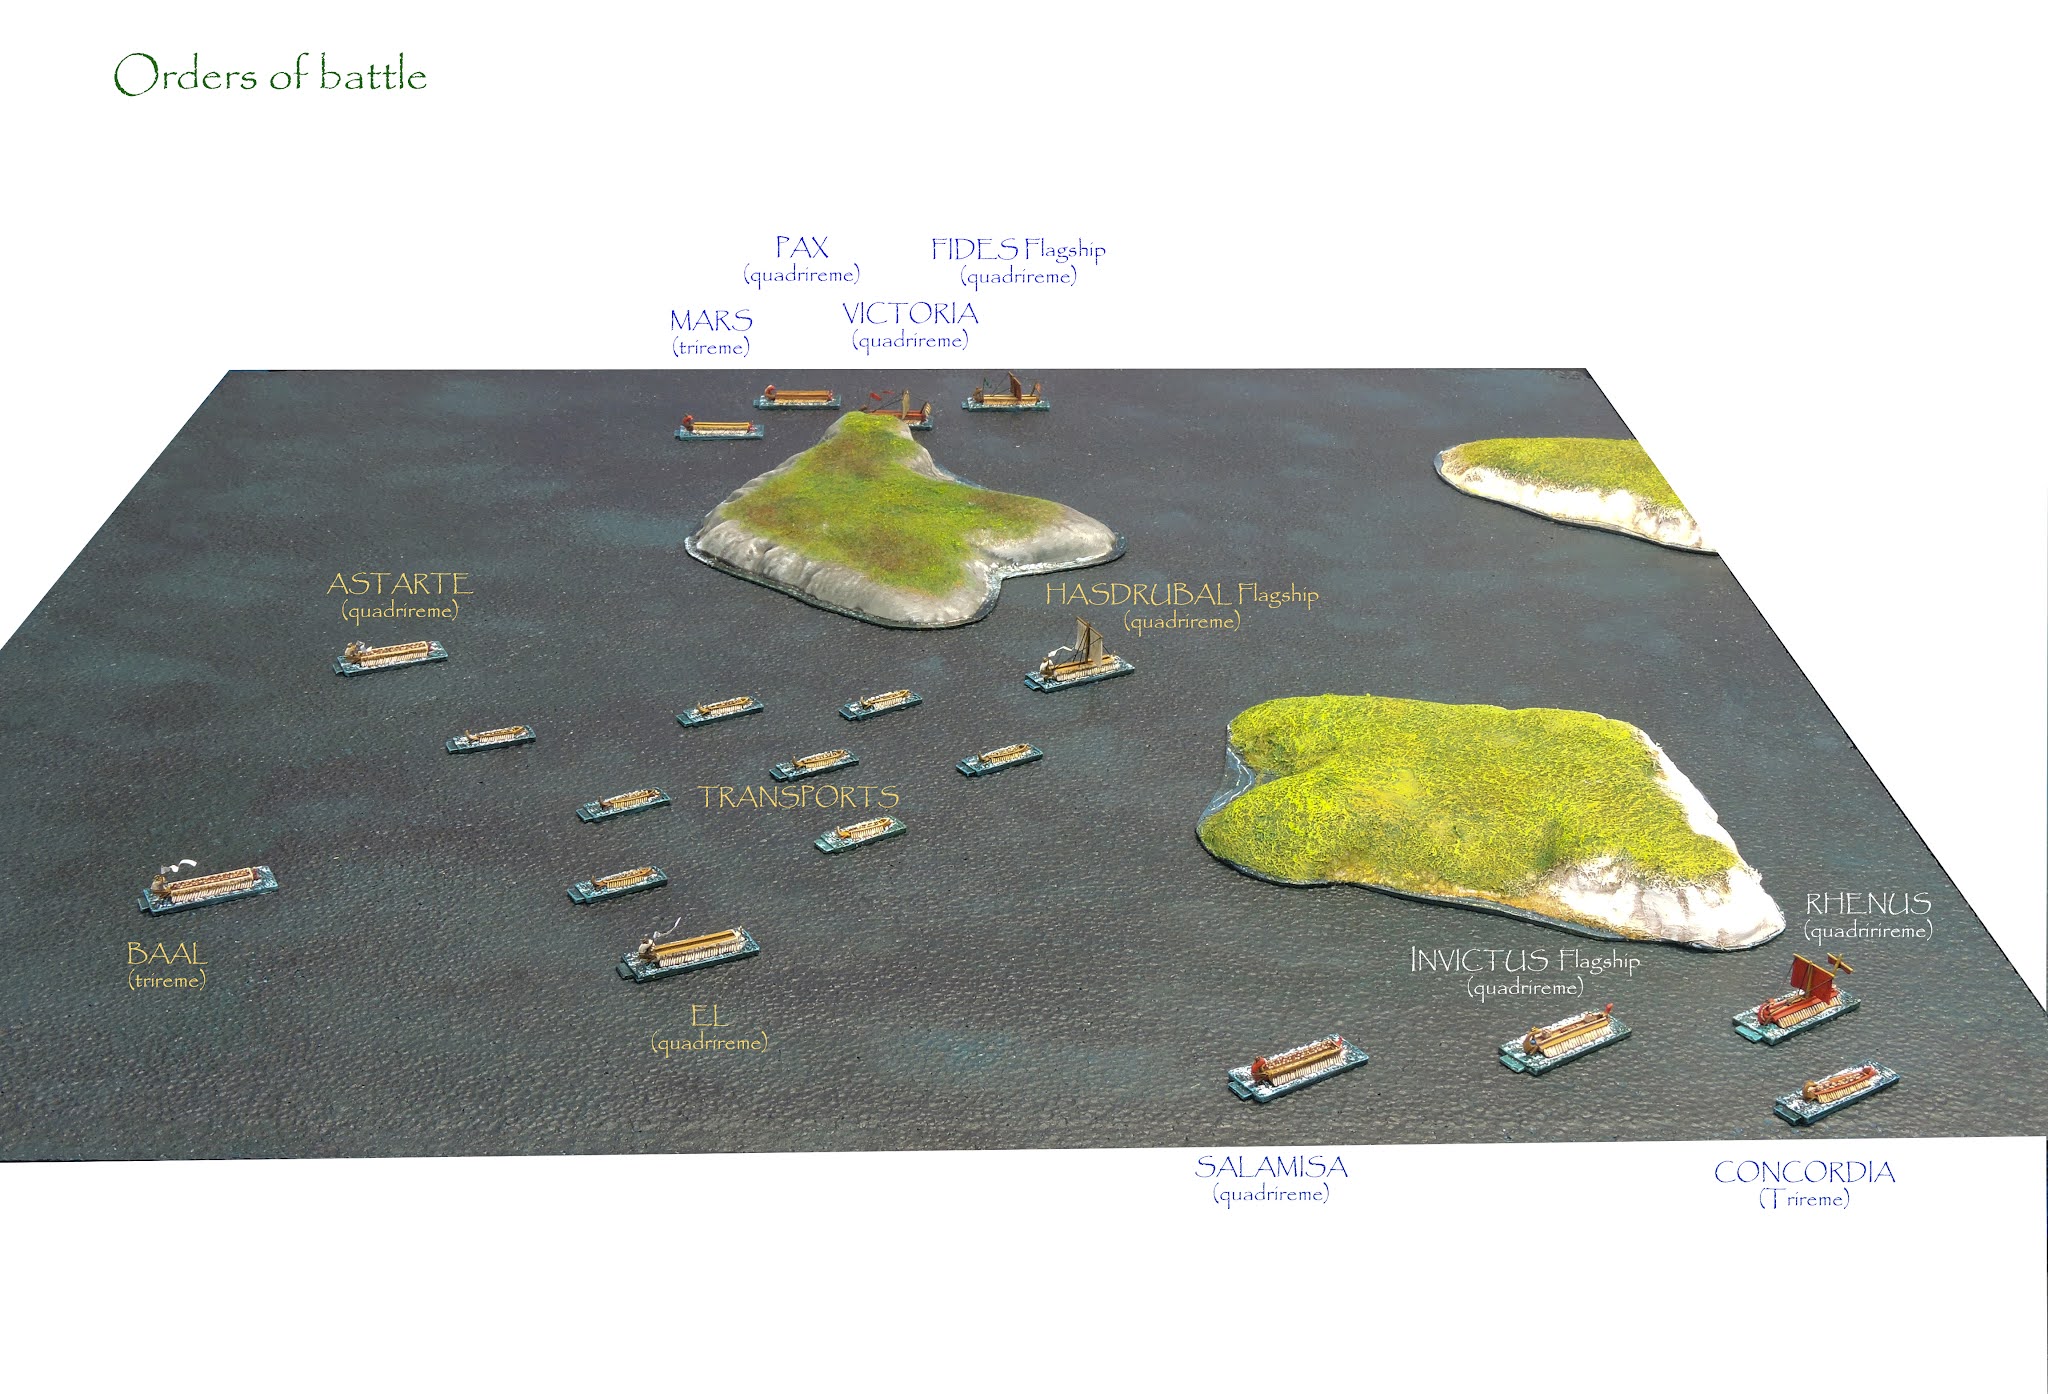 |
| Orders of battle |
Victory conditions for Carthage are to get at least 4 transports (from 8) successfully to the shore inside the bay. Two additional anchored ships are readying for sea in the bay. They will activate when each reaches a specific accumulated number on die throws per turn.
 |
| End T1 Southern Roman squadron moves to attack |
The Carthaginians pushed their flagship through the main channel and to the south whilst bunching the supply ships in the anchorage between the islands. The Roman group to the north headed inshore to block the entrance to the bay whilst the flag squadron to the south, moved to interdict the convoy. Attacks came quickly. The Roman admiral Anonymus used his large flagship Invictus to ram the Carthaginian flagship Hasdrubal.
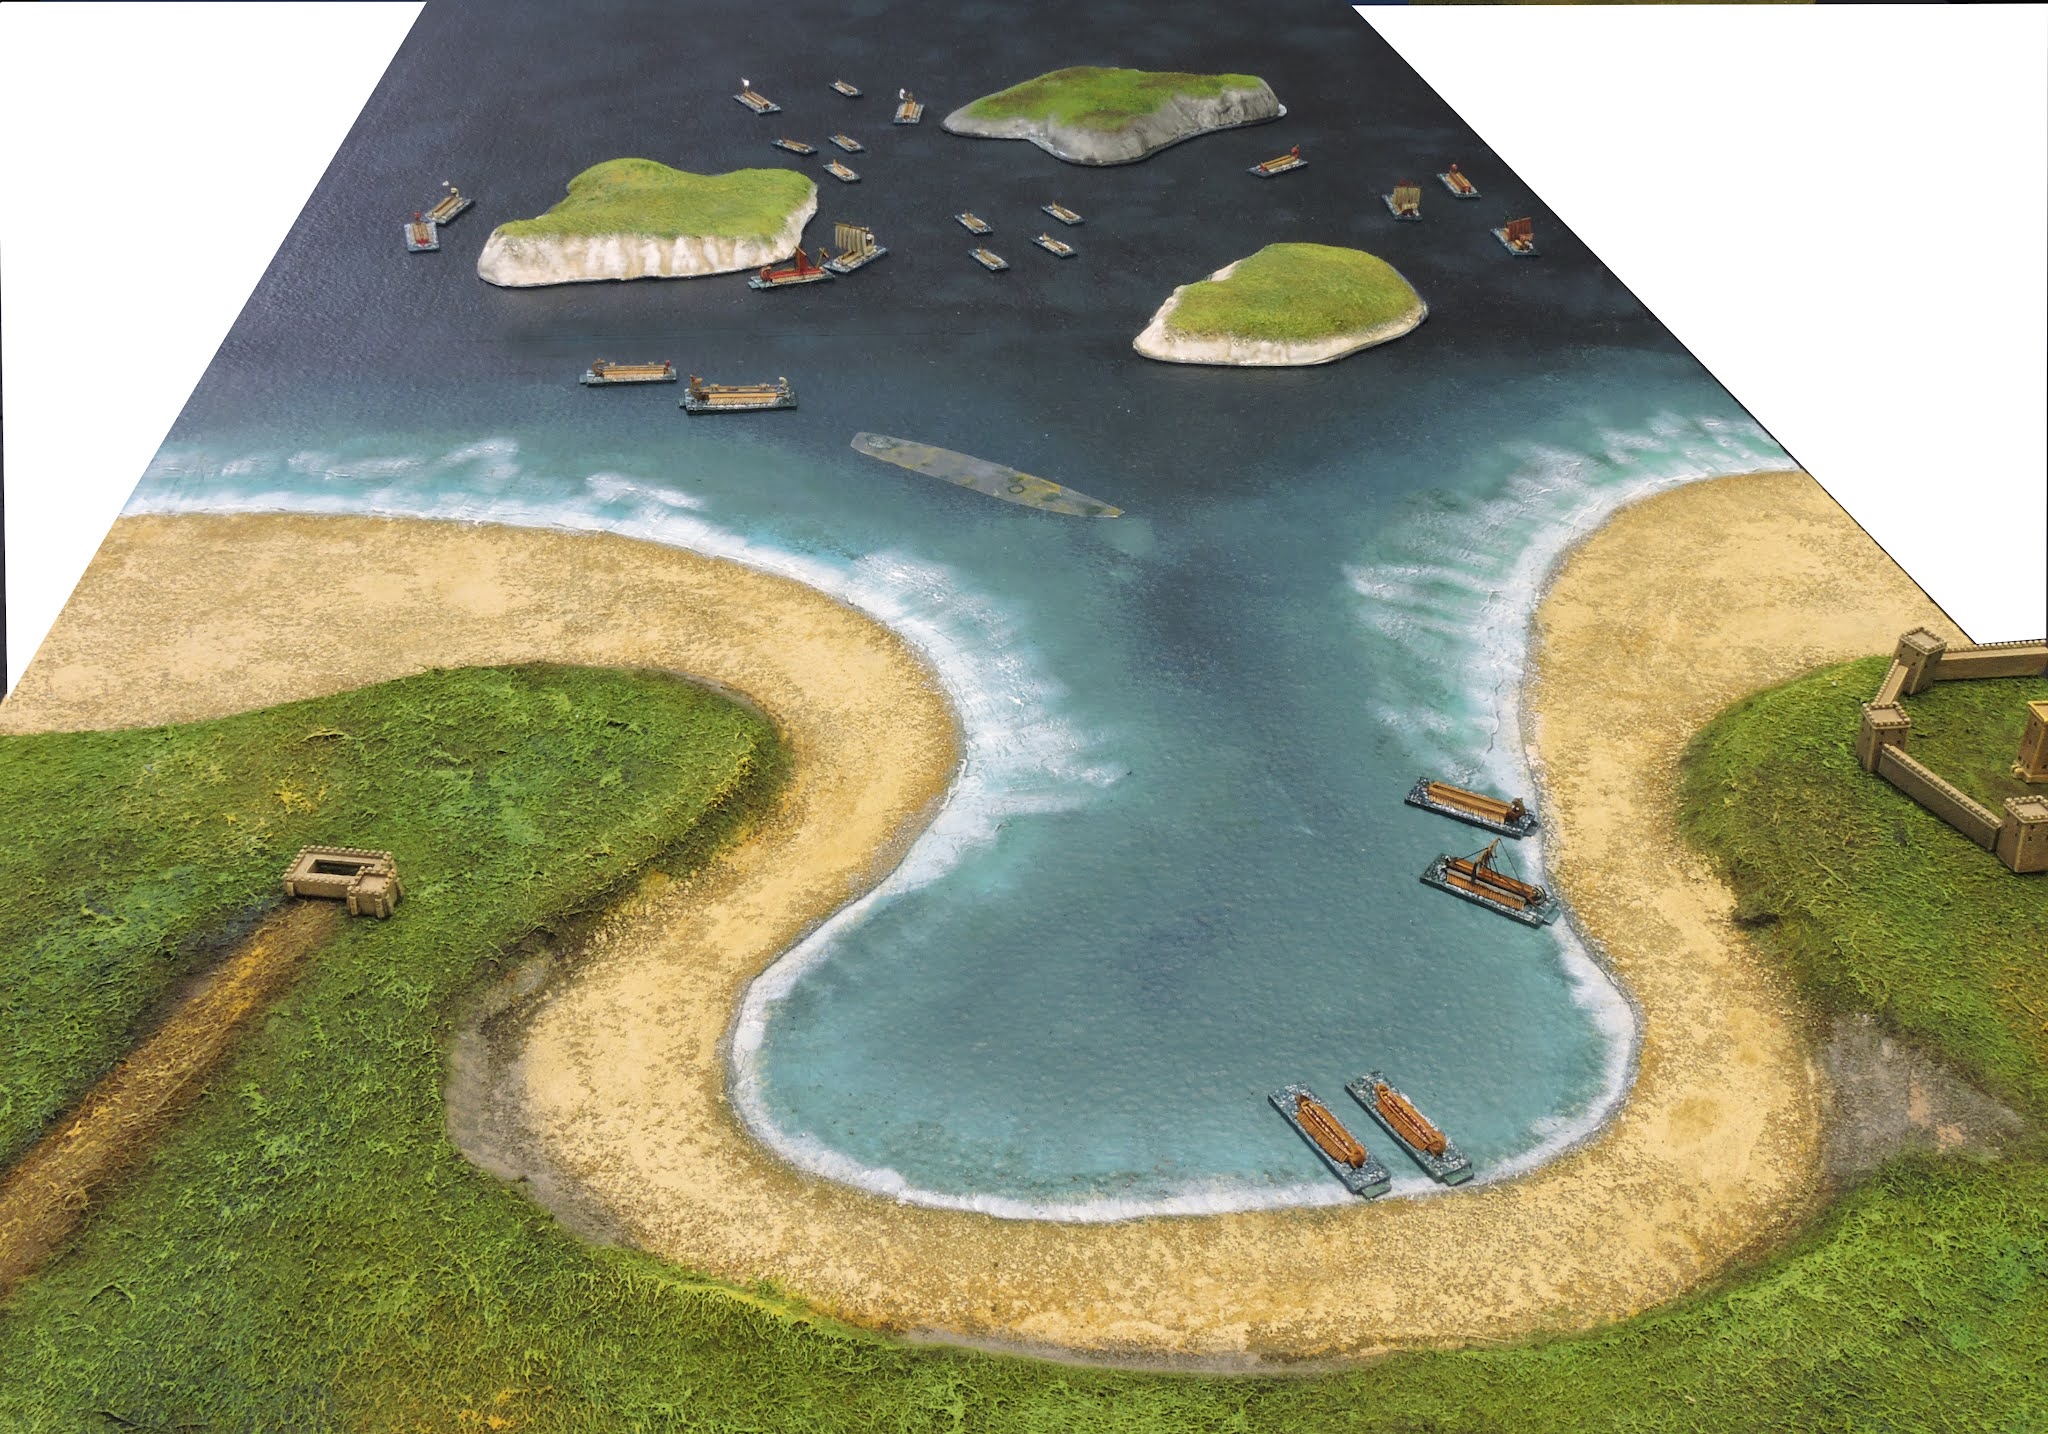 |
| Nice view from Trapani westward |
 |
| The Roman flagship rams the Carthaginian flagship head on |
This bow collision delivered a shuddering blow and when the corvus came down, both were locked in a protracted duel which lasted four turns of the game. The Carthaginians moved aggressively with the quadrireme El doubling and ramming the stern of one of the smaller Roman vessels Concordia. The subsequent boarding action saw every marine, rower and officer aboard Concordia cut down and the ship taken.
 |
| Stern ram by El on Concordia |
 |
| This bloody combat resulted in not a single Roman left alive aboard Concordia |
The northern Roman squadron split sending two ships through a channel. One quickly rammed and boarded a transport. This flank attack presented an irresistible target to the Carthaginian commanders and two escorts rammed the exposed starboard sides of the Roman ships. Astarte smashed into Mars and Baal into Pax. For fear of the transports being surrounded, the Carthaginians began to row backward and out to sea attempting to keep their transport flock together.
 |
| Victoria fires incendiary rounds at a transport which catched fire |
Some turned and tried to navigate to the south through the channel in which the empty Concordia drifted. Roman attacks in the tight channels had by this time managed to capture or incapacitate three transports. Invictus eventually overwhelmed the enemy flagship capturing the Carthaginian admiral. Pax was captured by Baal but the crew of Mars triumphed over Astarte. The Roman ship had been so badly damaged be the enemy ram that they abandoned their crippled vessel and took to the Astarte which they had some difficulty in freeing from the wreckage of their own abandoned vessel.
 |
| Various transports have surrendered or been taken. Rhenus passes through to harass the remainder |
The Romans made good use of their artillery landing hits on transports and warships. When the commander of the Roman flagship of the northern squadron Fides brought his ship towards the southern channel he used incendiary rounds to set fire to El which had run aground and was helpless. A push through the central channel by Rhenus and Salamisa scattered the Carthaginian transports and the crews pulling furiously out of the bay were too fatigued to catch the predatory Romans.
 |
| El is grounded and under fire from incendiary rounds out of Fides. |
Ultimately, despite an aggressive forward defence, the relief force was overwhelmed. The Carthaginians lost all of their transports and only Baal was able to extricate itself from the carnage and join the ships returning to Trapani. Roman casualties had been significant with Concordia and Pax being taken but later recovered and the flagship Invictus immobilized by battle damage and losses. Mars was abandoned barely afloat.
 |
| The late arriving Carthaginian reinforcements are out of time to save the day. |
We agreed to fight the battle for a second time and try a different approach route by the relieving force.
 |
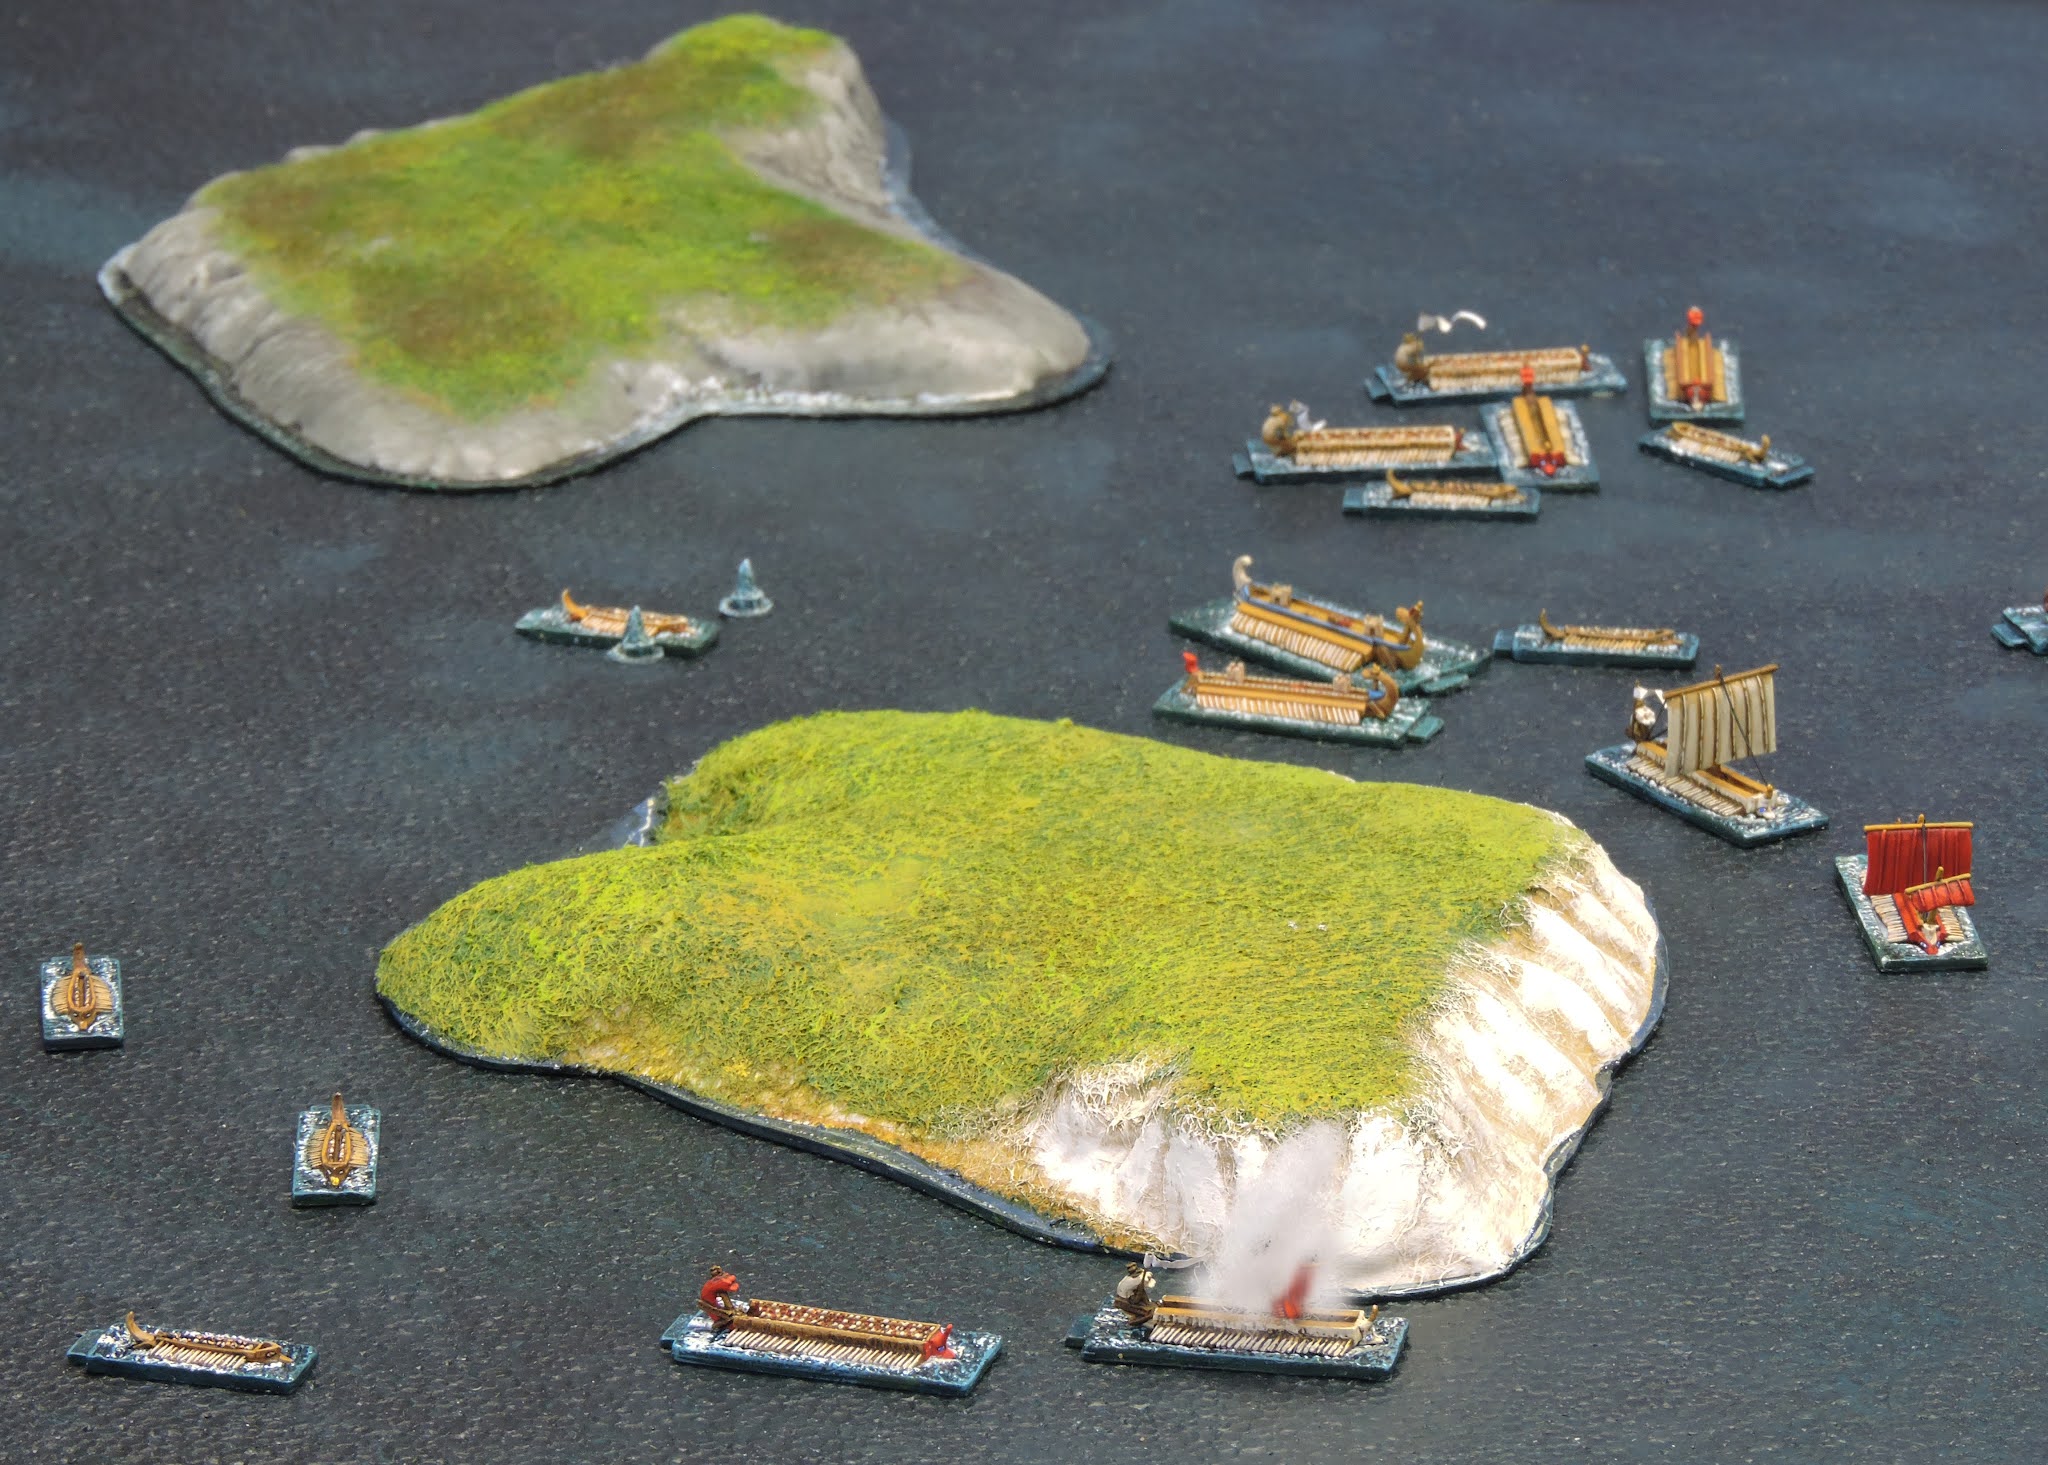
| General action at the height of the battle |
Game fought on a 2 x 4 feet table in 1/1200 scale with Mad for War rules.