The war between the English and Dutch intensifies with King Charles' fleet desperate to expunge the shame of 1667 which haunts the navy, torments national pride and the authority of the Crown.
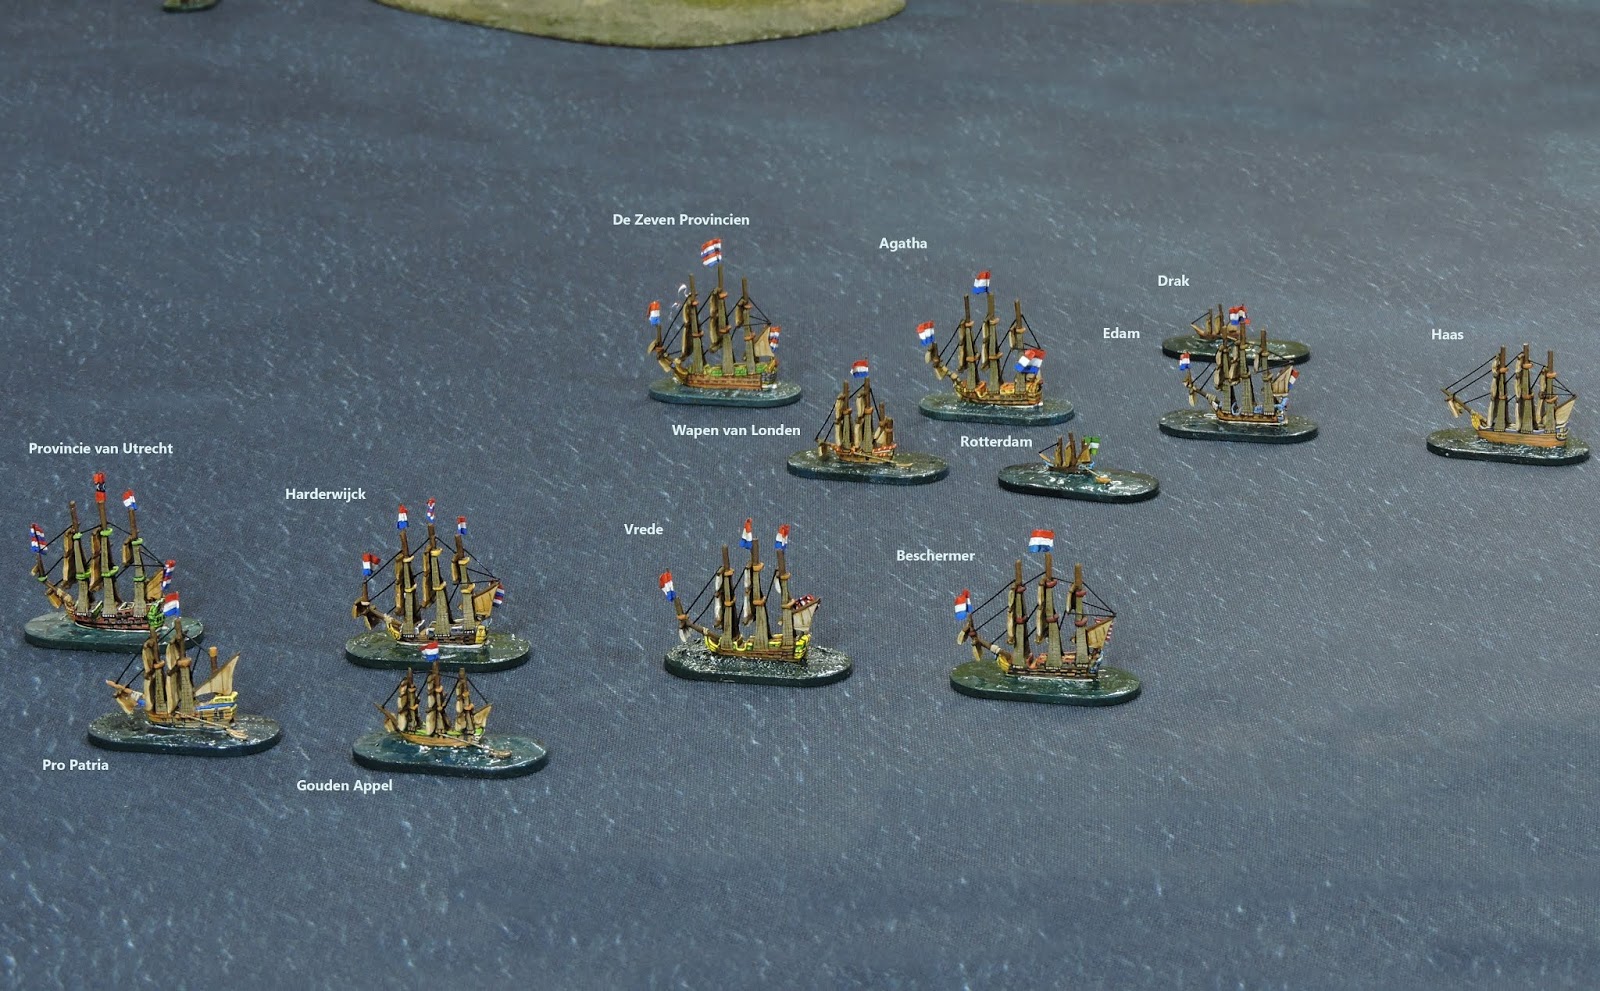
Dutch admirals are brazen and bold and have little fear of probes and forays into the very heart of home waters. One such 'cruise' is moving down the English coast off Essex and appears to be heading into the mouth of the Thames Estuary. God forbid that the republican Dutch could repeat their triumph on the Medway although the fleet is now in a much healthier condition and itself spoiling for a fight.
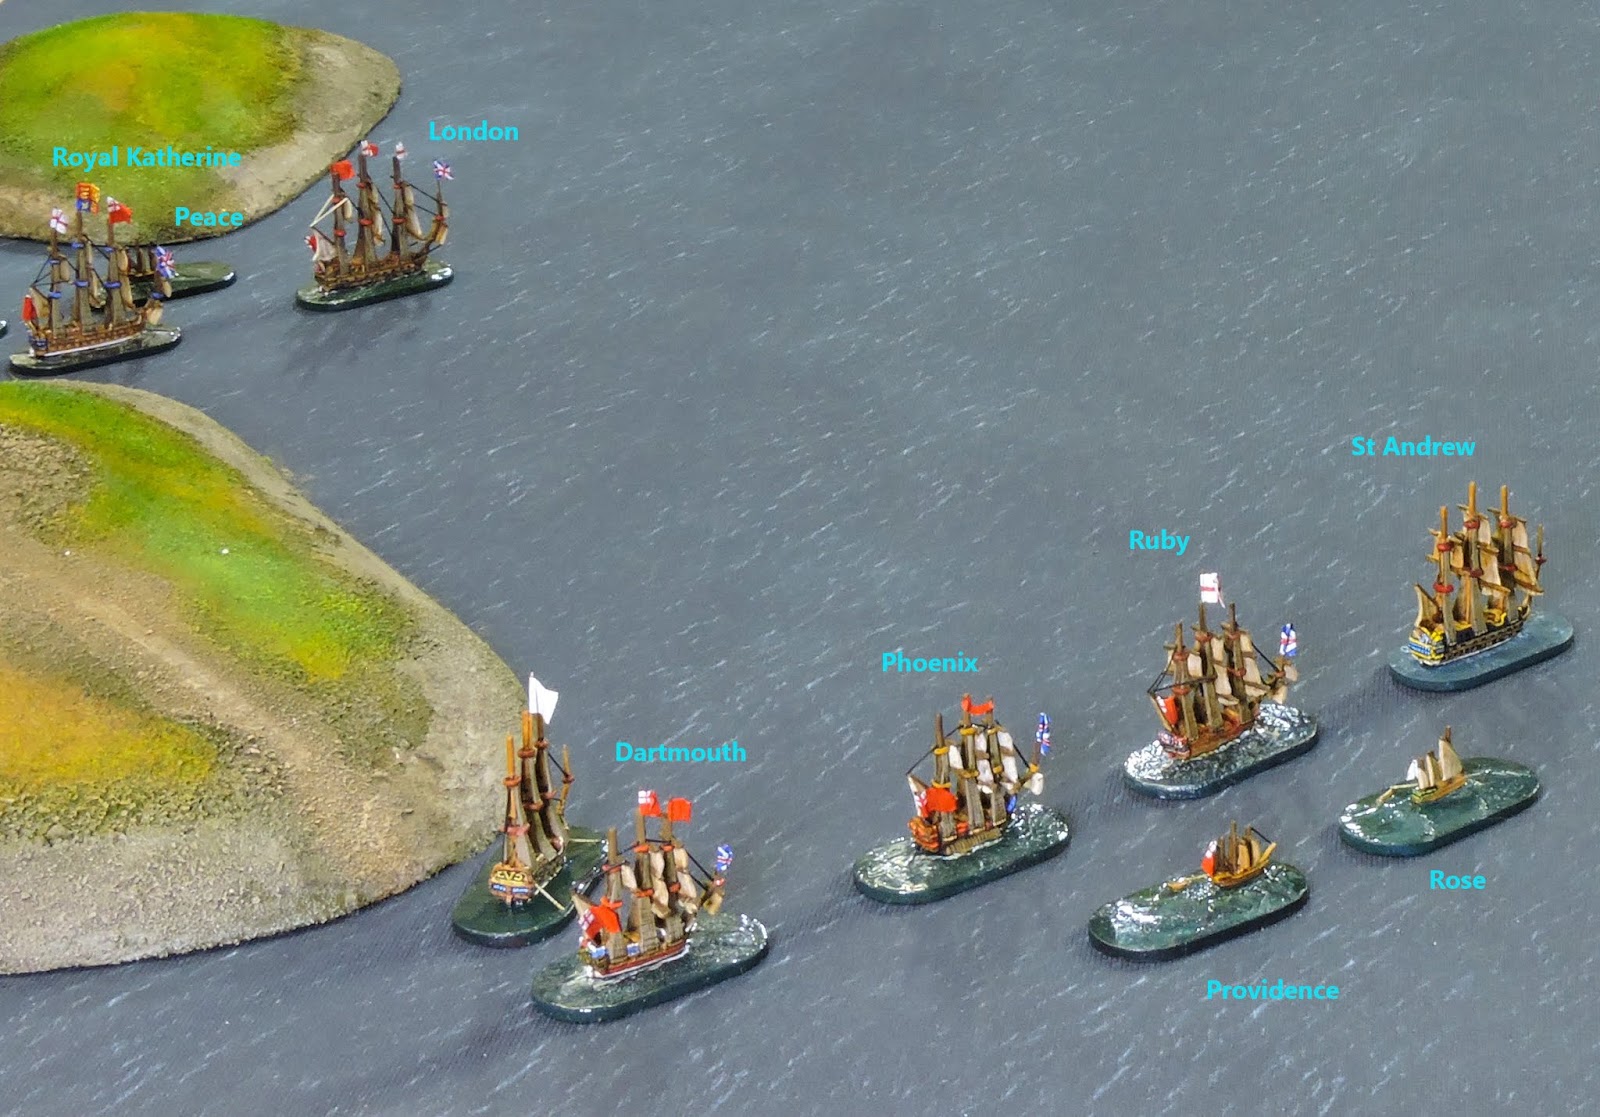
Admiral Spragge has been sent from the Medway anchorages to rendezvous with French men o'war allied to England. The hope is of repulsing this latest Dutch piracy. Will the French fight or, is it all for political show? With the Dutch under the legendary Admiral De Ruyter to windward and sailing south east, the squadrons converge off Foulness Island.
Note: De Ruyter has a +1 initiative advantage over Spragge. I introduced a reload throw based on the skill check for crews. This really prevented the line 'em up and blast mentality although of course I was fighting the scenario solo!
Turn 1
The fleets closed with each other although the French squadron,sailing almost directly into the wind made slow progress which immediately made their English allies suspicious of there commitment. This was more to do with the inexperience of Foudroyant's crew and the weather than malicious intent.
 |
| End of Turn 1 from the north east, Dutch in the foreground. |
De Ruyter's two divisions attempted to cross the English lines and with the wind at the backs made good speed whilst the two French ships struggled to make progress into the strong northerly headwind. Van Nes's ships lost their formation somewhat at they altered course to cut across Spragge's column.
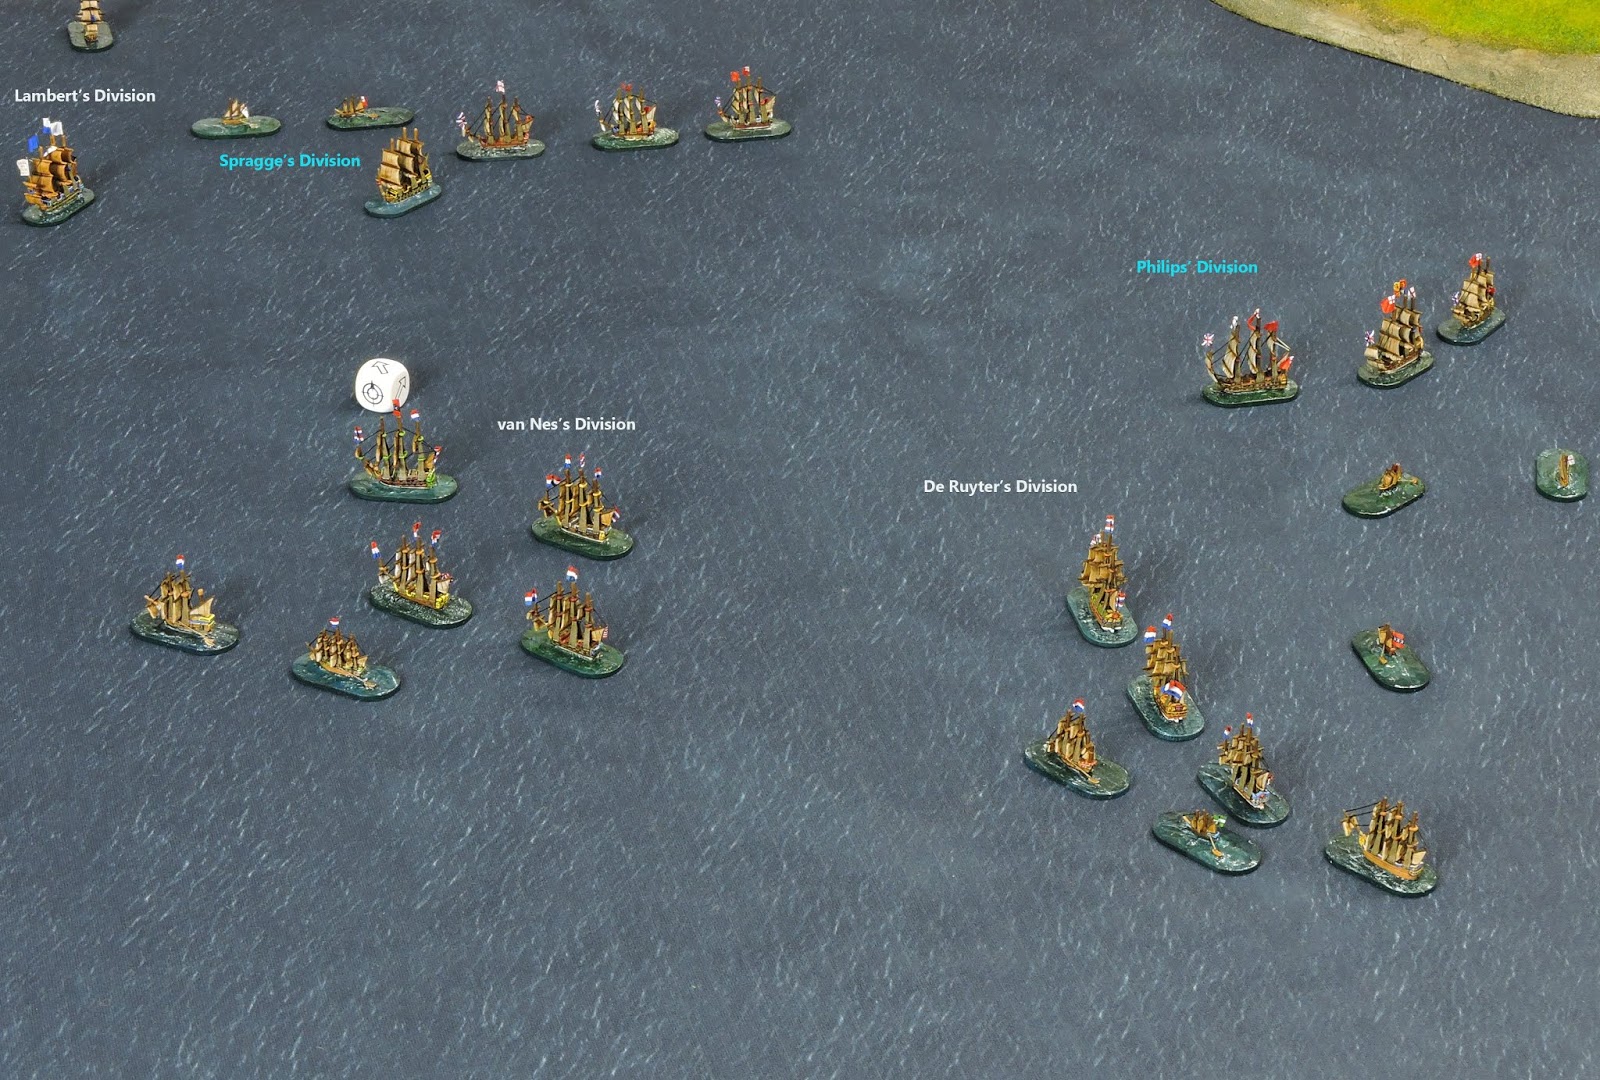 |
| Turn 2 with the divisions of each fleet indicated. Spragge and Philips's have altered course. Looking from north east. |
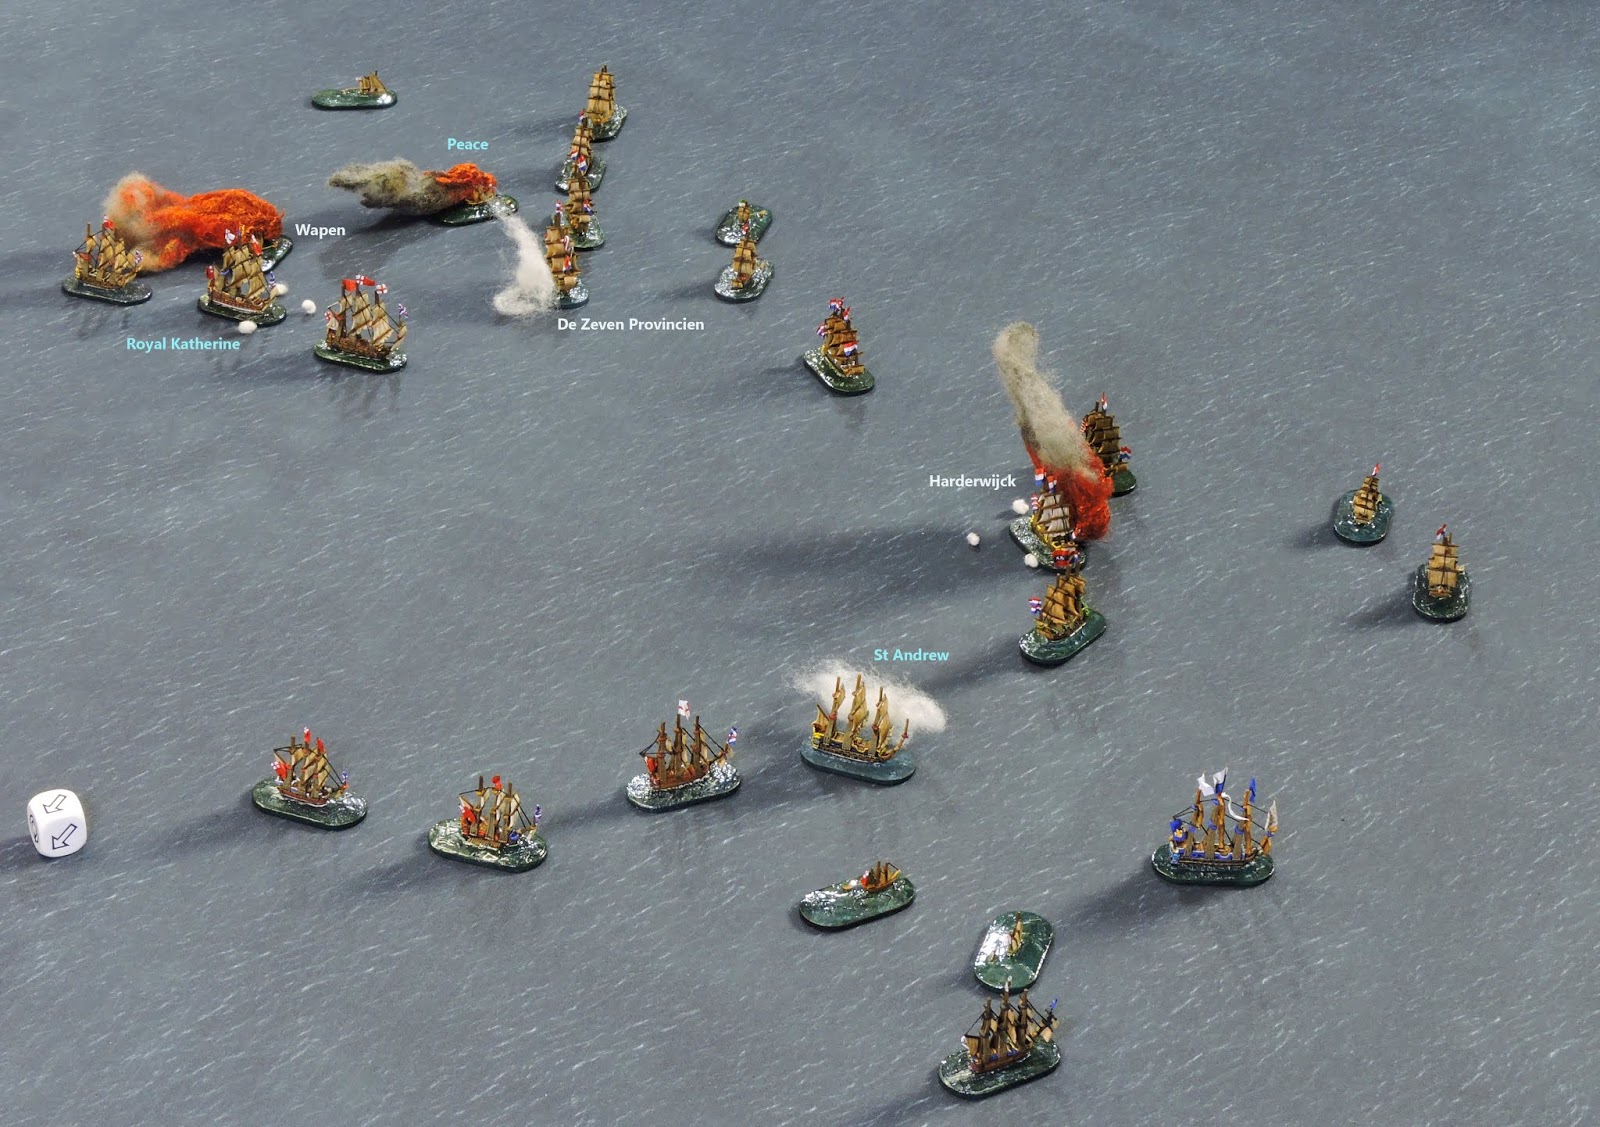
The fighting commenced as the English won initiative for the second consecutive turn. The fireship Peace was set alight and rammed into De Zeven Provincien. A fire ignited but was quickly brought under control and the blazing wreck was cut loose and drifted with the wind. St Andrew's guns thundered and ripped into Harderwijck which immediately caught fire from the massive amount of damage sustained. The Dutch flagship opened up on Royal Katherine at very short range, firing low and tearing through her lower decks putting nearly half of her guns out of action. The Dutch fired Wapen van Londen which was carried by the strong wind toward the enemy vessels.
 |
| The English fireship Peace rams De Ruyter's flagship, fire broke out the Dutch cut the gear and ship away. From SE. |
 |
| End of Turn 3 seen from the south east with ships in action noted - see commentary for details. Looking from south east. |
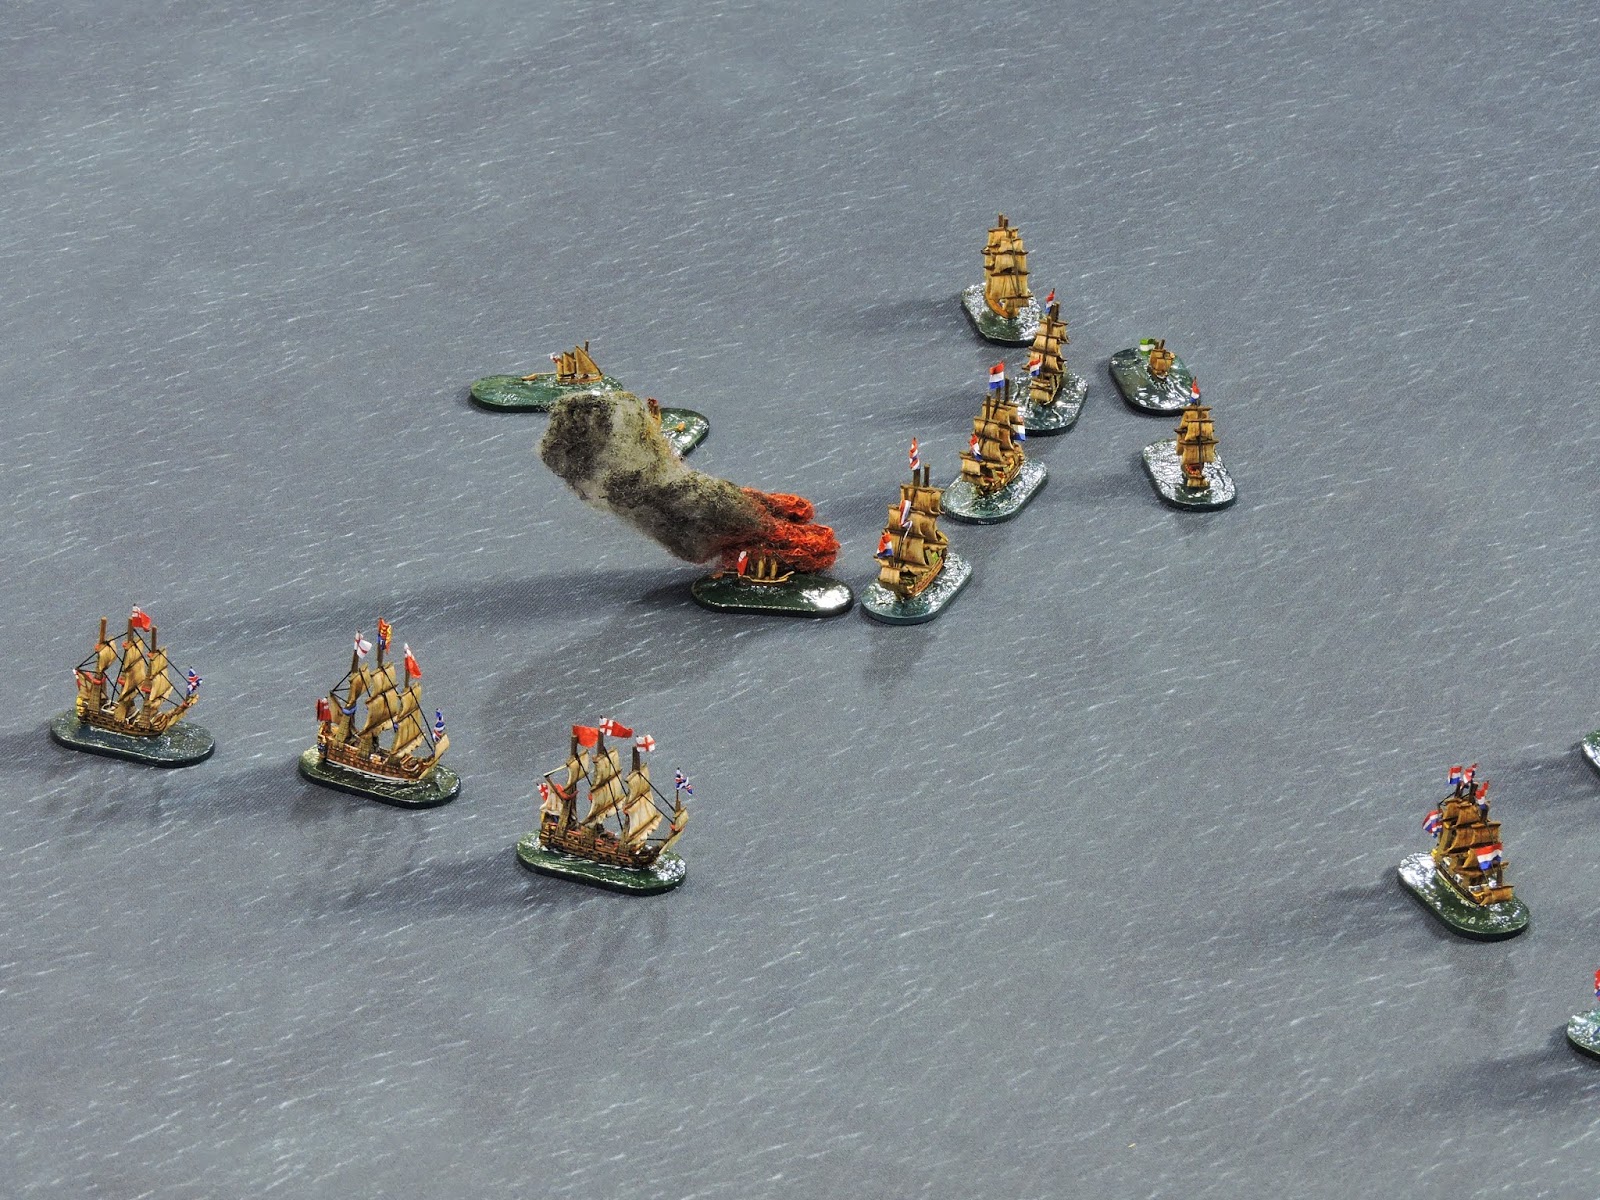
The close quarter nature of the fighting lead to several dramatic incidents. The drifting Peace, ablaze and abandoned, collided with the enemy fireship Wapen. Firstly the incendiaries in Peace exploded blowing her apart and the blast set off the charges on Wapen which also blew up. The massive 1st rate London was unable to alter course and rammed the small fireship Drak almost sinking her.
 |
| Philips' and De Ruyter's squadrons fully engaged looking from the south. |
in horror as her tormentor - St Andrew, ploughed into her amidships splitting the hull and causing her to begin sinking, The collision damage was a massive 10 points. Monmouth opened fire on Edam setting her alight although the Agatha quickly came to her aid and pounded Monmouth. The English ship was holed beneath the waterline, had her lower gun deck destroyed and lost much of her speed and manouvreability as she was taking on water so quickly. London retaliated causing much the same havoc to Agatha.
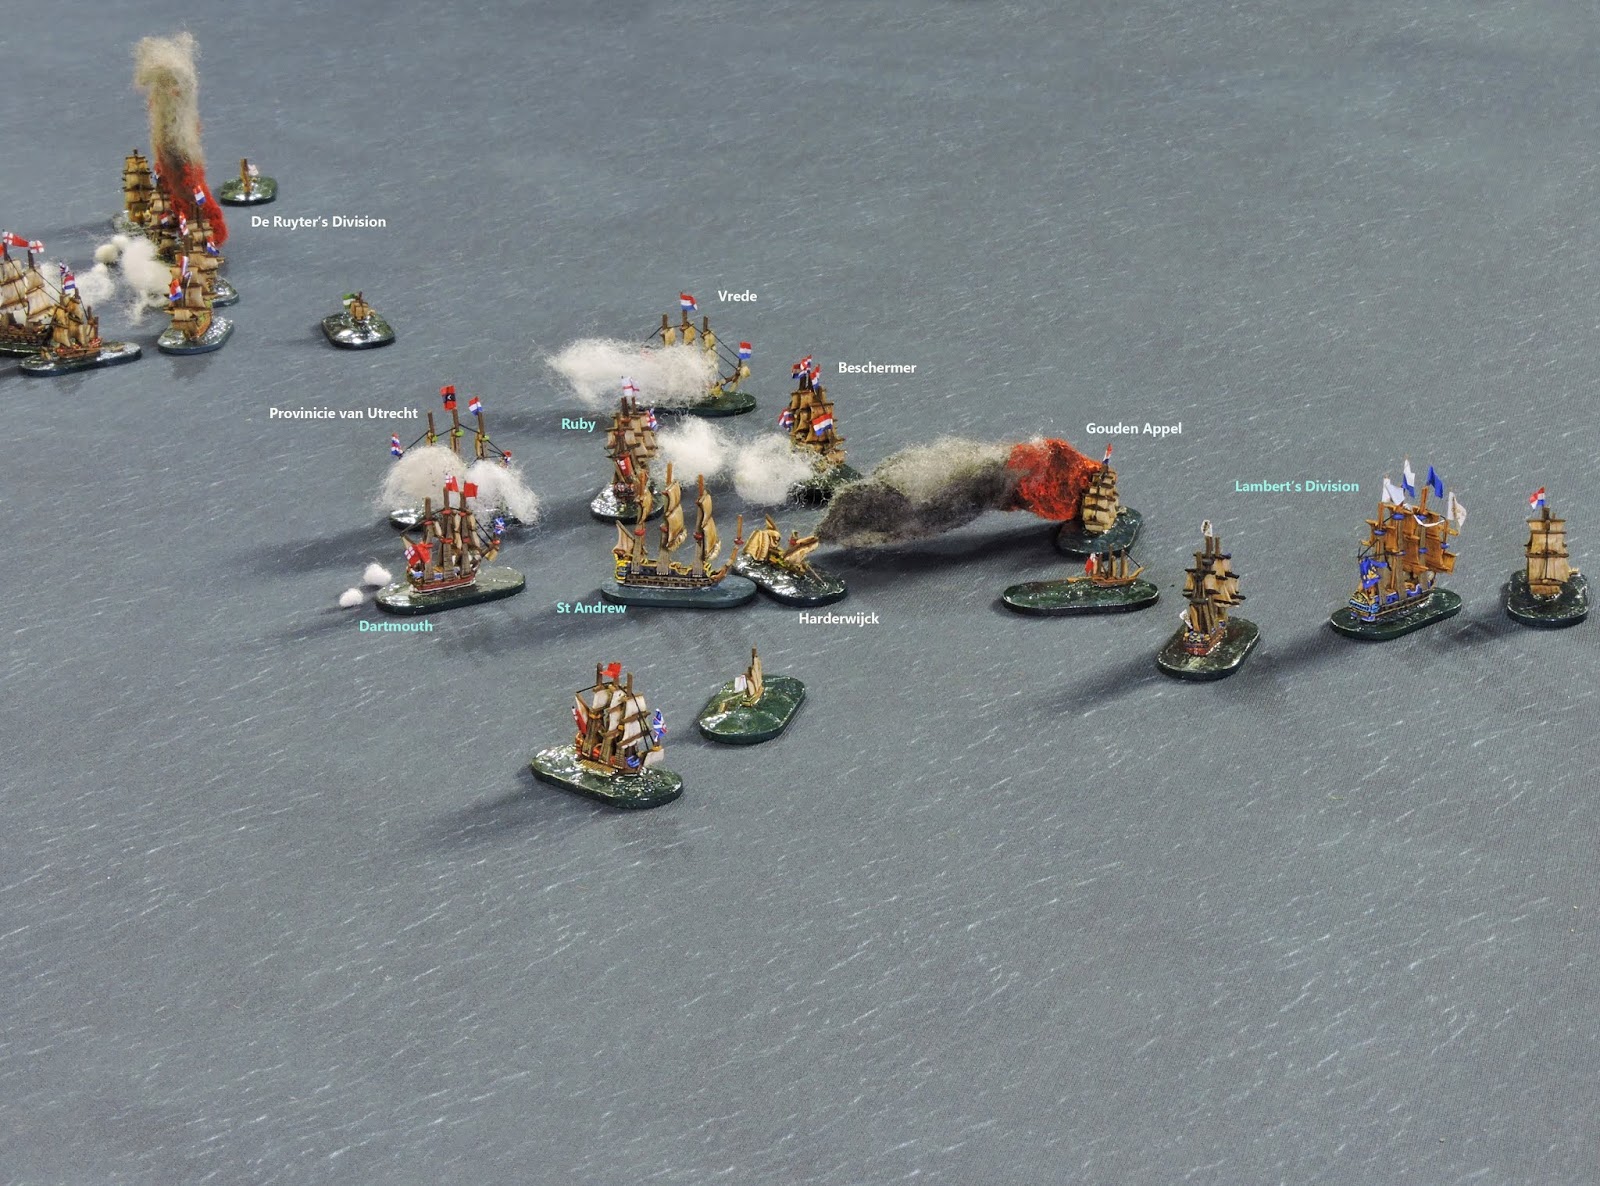 |
| Spragge and van Nes slug it out whilst the French squadron attempts to get windward of the Dutch. Looking from south east. |
Part 1 concludes here. The drama of the remaining four turns is covered in the second part of the battle report.