
The board will be 4x8', constructed in two halves. The details will evolve as I get stuck in, but my initial step is to rough in the main forms. I've written lots of tutorials on the subject of building terrain, so I'm not going to detail every step, but there are some changes to my normal process and maybe a few new techniques I'm going to use and I will be sure to cover those...
Starting with step number one! I usually use wooded bases and frame the edges with wooden battens - these are extremely sturdy, but very heavy. It would impractical to make 4x4' boards in this way because I wouldn't be able to easily maneuver them around the house, never mind transporting them to Fredricksburg! I also normally use dense insulation foam, but without the wood, I wanted something with a little more durability and opted for foamcore...

This was not a cheap option, but I think was the best material to meet my criteria. I was able to buy 4x8' sheets of 1/2" and 1/4" foamcore at the art store and they cut them into 4x4' sheets for no extra charge (the girl at the store said they normal charge for this, but I guess I was charming so she cut them for free). Each board will be made from two sheets stacked together which should minimize any warping. There will also be a further two sheets to build up the land masses.
To cut the foam for the rivers, I use three tools...

The box cutter is used to make the initial shape. Then I use a razor saw to bevel the edges and finally a hobby knife to neaten up. The razor saw makes a fair bit of mess, but I use a sanding block to create a smooth slope and round out the sharp edges.

This doesn't have to be perfect because I'm going to seal the river bed and slopes with filler, but a smooth base will make an easier job out of this step.
It took several days to get to this point.


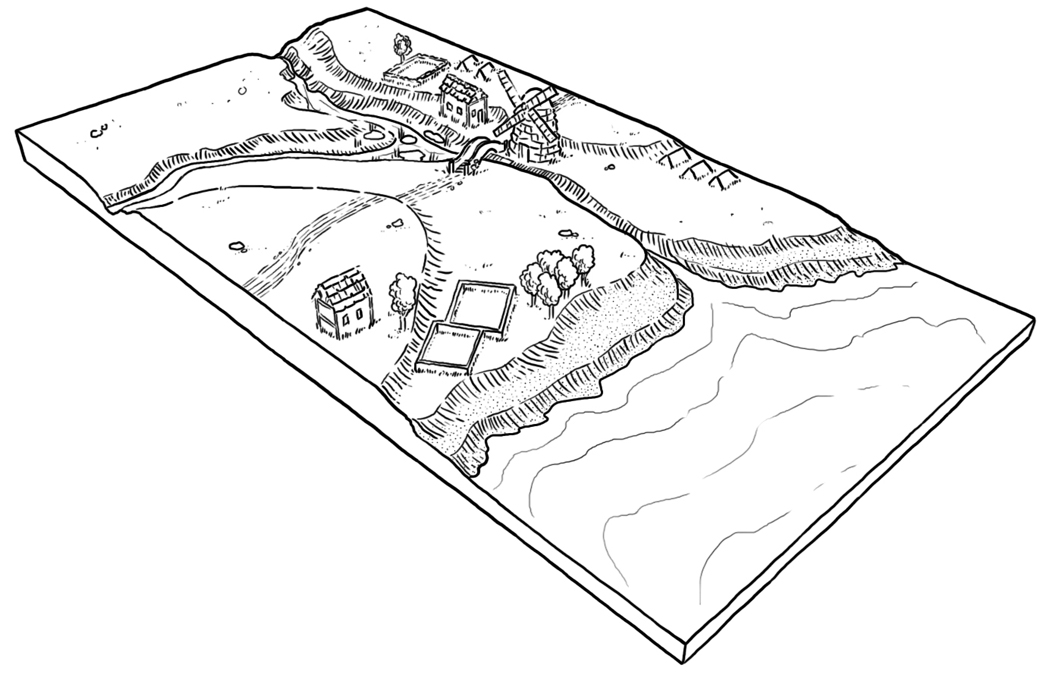
Not much to look at yet and I apologize for the crummy photos, but they were taken in the midst of working. The buildings are from Tabletop World. Again, not the cheap route, but I've been collecting these for some time (already had the windmill, too) and haven't had the chance to paint them. They are fantastic models and I can't wait to get to work on them.
A quick note on the Penny Burn Mill. Many accounts of the battle simply refer to it as 'the mill'. Others mention a windmill and one specifically mentions a watermill. This was all very puzzling as I was trying to sort this out. I opted for the windmill originally because there was a windmill south of Derry, appropriately on a rise known as Windmill Hill, and I found a record that the WINDMILL at Penny Burn was demolished in 1860. Recently I found evidence that cleared up the source of confusion - Penny Burn Mill was in fact BOTH a wind and watermill! I didn't know these existed. In any case, I'm sticking to the windmill now, but I'd thought I'd make note of this so someone doesn't come along and say Penny Burn Mill was a watermill...
The fields are just place holders - I am going to build new fields for this game. There will also be some scattered trees, hedgerows, etc. I still need to build up a low, gradual hill on the southern (left of top photo above) edge.
The next step will be adding the grass mat to the open areas, but I am waiting for it to come in the mail (maybe I'll start painting the windmill). I will post more pics when these look more like terrain and less like packing materials. If you have any questions about the process so far, feel free to post them below and I will do my best to answer.
Barry informed me today that he was going to rewrite the Pennyburn Mill scenario for the Ireland book to match my adaptation so that is a cool bonus to this project!