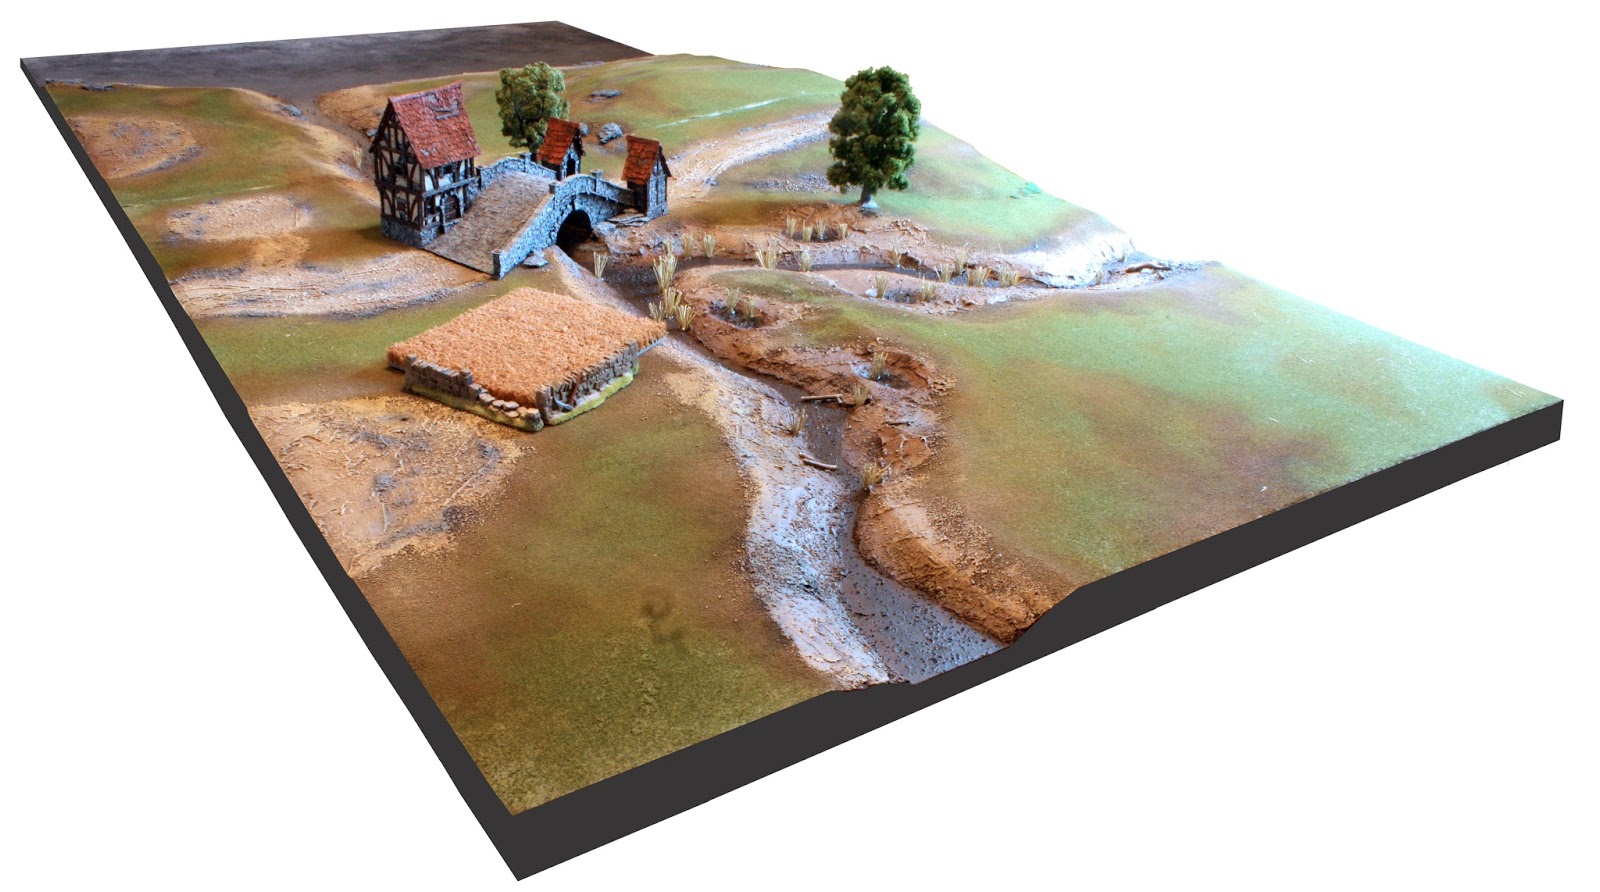
Most of the painting is finished. The deep water at the rear of the photo above has been blended from black to a deep blue to a muddy brown. The streams and pools in the marsh are mostly brown with some blue and black blended into the widest parts to simulate deeper water. It will be time to make all this water shiny, but first I wanted to add a little more detail to the banks...

Nothing helps define a marsh like reeds and lucky for us these are ridiculously simple to model. Pretty much you just need an old wisk broom (with real bristles, not synthetic), a pair of scissors, and a hot glue gun. You can see a full tutorial at the Quindia Studios blog (and see another way to paint your river).
You just need to channel your inner Bob Ross (look it up on You Tube young folks) and place happy little reed clusters where you think they should live. I concentrated at spots where the water meets the shore, but you can easily choke the stream full of reeds. These are a bit tall, but I'm going to trim them back a bit with scissors after I've given everything a good chance to dry. Also remember we want to be able to move models around this so save some space for them. You can go back with a wash and make these any color you like - I may leave them natural, but I'll see after I add some more texture.


Yes, there is more texture coming! I have a variety of ground cover to add. I want to make the marsh look different from the rest of the board and I have a lighter static grass to add in places, particularly on top of the hill to make it look like it's catching more of the summer sunshine.
The bridge is a model from Tabletop World and I have several more buildings to add to the layout, including an amazing windmill kit (on the painting table - pics soon).